Gateway Installation - An In-Depth Guide
What is in the box?
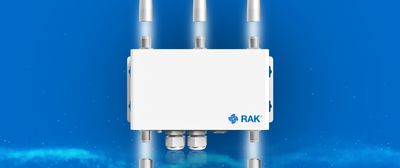
The package contains a gateway, antenna's, port terminators, mounting brackets and a power-over-ethernet (PoE) injector.

Positioning
The gateway should be placed as high as possible, with as few as possible obstacles in the way. Ideally this is a (radio)tower, but we know this is not always available. Other options are high up on a roof or (light) post. Less ideal but also possible is placement on the side of a high building.
With all locations the main concern should be line of sight to the sensors. LoRa is a technique that can cover great distances, but the more obstacles that are in between the sensors and the gateway, the shorter the range becomes. Obstacles like hills, trees and buildings reflect and block the signal.
We wrote about positioning before in this blog.

Placement in a Tower
The tower usually provides the best height and the best line of sight to the sensors, as they are often built away from buildings and on top of hills. Gateways in towers are somewhat inaccessible, so it is recommended to test the gateway first before installation.

Placement on a rooftop
Whenever the gateway is placed on a roof, always try to use the roof of the tallest building, as taller buildings in the area might block (a part of) the signal. Also, when the gateway is placed on a large, flat roof, it is also wise to use a mounting stand, as the building the gateway is standing on could potentially block the signal. Make sure to use a weighted stand, so the construction doesn't fall over in heavy weather.

Placement on the side of a building
This location is less ideal, since the building is blocking a major part of the signal. Especially when the antenna does not stick out above the roof. This placement can be done when the sensors are only placed on the free side of the gateway. Since the gateway is placed lower, the reach of the gateway could be less.

Placement in a post
Whenever the post is the highest freestanding object in the area it could function similar to a (radio) tower. Usually posts are easier to use, whenever near a field. Be aware of surrounding obstacles potentially blocking the signal.
Installation
Correct assembly is equally important for proper functioning of the gateway. It is important that all antenna slots are in use or terminated before you power the gateway.

Antennas
The three antennas we deliver with the gateway should all be mounted on top. The largest antenna is the LoRa antenna and goes on the left slot. The shorter LTE antennas should be mounted on the middle and right slot. When you screw on the antenna, make sure it is perfectly straight and not skewed (sometimes the antenna tilts a bit during placement).
Port Terminator
All three bottom ports should be secured with a 50 Ohm load. These port terminators make sure that the internal electronics do not burn through, whenever the ports are not in use. This is the reason a gateway should not be powered before the ports are closed off.
Power
The gateway is powered by PoE only. This means that the power comes in via the Ethernet cable. This cable should be a CAT 5e or higher. Older cables are not suited for PoE. The cable goes into the PoE slot in the gateway and the PoE slot in the injector. The injector is connected to a 110-220V power outlet.
Whenever the gateway is placed far a way from a power socket you have two options. You could use a long Ethernet cable or you could use a power extension cord to keep the injector close to the gateway. The last option allows you to use a shorter Ethernet cable, but be aware that the injector is not watertight, it should be installed at a dry spot.

Internet Connection
The LoRa messages a gateway receives must be sent to our servers. Therefor an active internet connection is needed. This can be achieved via with a SIM Card or an Ethernet connection.
Sim Card
For the first option you install a local sim card. This could for instance be a prepaid data card. 1 GB of data should be enough for some months. It depends on how many LoRa devices there are in the vicinity. Be aware that there should be proper 3G/4G coverage in the area the gateway is going to be placed.
Ethernet Connection
The other option, plug the PoE injector also to an active LAN port on your local router. For this, another Ethernet cable is needed.

Test
Before you fully install the gateway it is recommended to test if the internet connection is working. The easiest way to do this is to set up the gateway indoors (or close to final installation spot) and activate a registered Farm21 sensor nearby. Keep the gateway and the sensor a few meters apart; LoRa doesn't work properly on very short distances. After an hour the first measurements should be visible in your Farm21 account.
Final setup
After working is confirmed it is time install the gateway at the desired location. The gateway should be upright, with the three antennas on top. The mounting brackets allow you to attach the gateway to a pole or similar. Make sure the gateway is properly secured. The cables should be guided (with tie wraps) along the pole, so they are not dangling. Also be aware of sharp edges, as especially Ethernet cables are vulnerable to cable breakage.
This post was originally published at https://www.farm21.tech/post/gateway-installation-an-in-depth-guide by Farm21


