

How to build a LoRaWAN® gateway? Make your own

In previous articles, we discussed What is a LoRaWAN gateway and How do LoRaWAN gateways work. It is time to dive even deeper into the pool of knowledge regarding gateways and learn how to make one. We will give you two building options, so keep reading.
We’ve mentioned that LoRaWAN is a Low Power, Wide Area Networking protocol designed to connect your nodes and sensors to the Internet wirelessly. A LoRaWAN gateway is a must in every scenario. You can always buy a commercial, premade one, and easily deploy it straight from the box, but this article is for people who like to build and test things on their own! As we said, two cases will be considered below. One will be using a Raspberry Pi single-board computer as a host to process incoming and outgoing traffic. The other case will demonstrate how to configure a Linux machine to act as a gateway. Let's build!
Building a Raspberry Pi-based LoRaWAN gateway
For this building, you will need:
- Raspberry Pi 3 Model B+ / Raspberry Pi 4 – for the host.
- LPWAN concentrator – for the LoRaWAN functionality. Here, the RAK2287 WisLink LPWAN Concentrator (with SPI interface) is used. It has a mPCIe form factor, making the concentrator easy to integrate existing systems and add LoRaWAN capabilities to them.
- Pi HAT – to connect the concentrator to the Raspberry Pi. Here, the RAK2287 Pi HAT is used. Note that it is compatible only with the SPI version of the RAK2287 LPWAN concentrator.
- LoRa and GPS antennas
- SD card
- USB card reader
- Power supply
- Laptop / PC
As the Raspberry Pi uses the SPI interface on its 40-pin connector, the WisLink LPWAN Concentrator Module for LoRaWAN Gateway must also be with SPI Interface.
Building your own Gateway is a pretty straightforward process. It is like playing with Lego, but instead of stacking blocks, you stack different components.
Start by positioning the Pi HAT over the Raspberry Pi. Both have a 40-pin connector that fits together when they are gently pressed on top of each other. Make sure not to damage the pins when connecting them.
We recommend you use spacers and some nuts to secure the Pi HAT to the Raspberry Pi, so it is more stable and eliminates the danger of damaging the pins from movement.
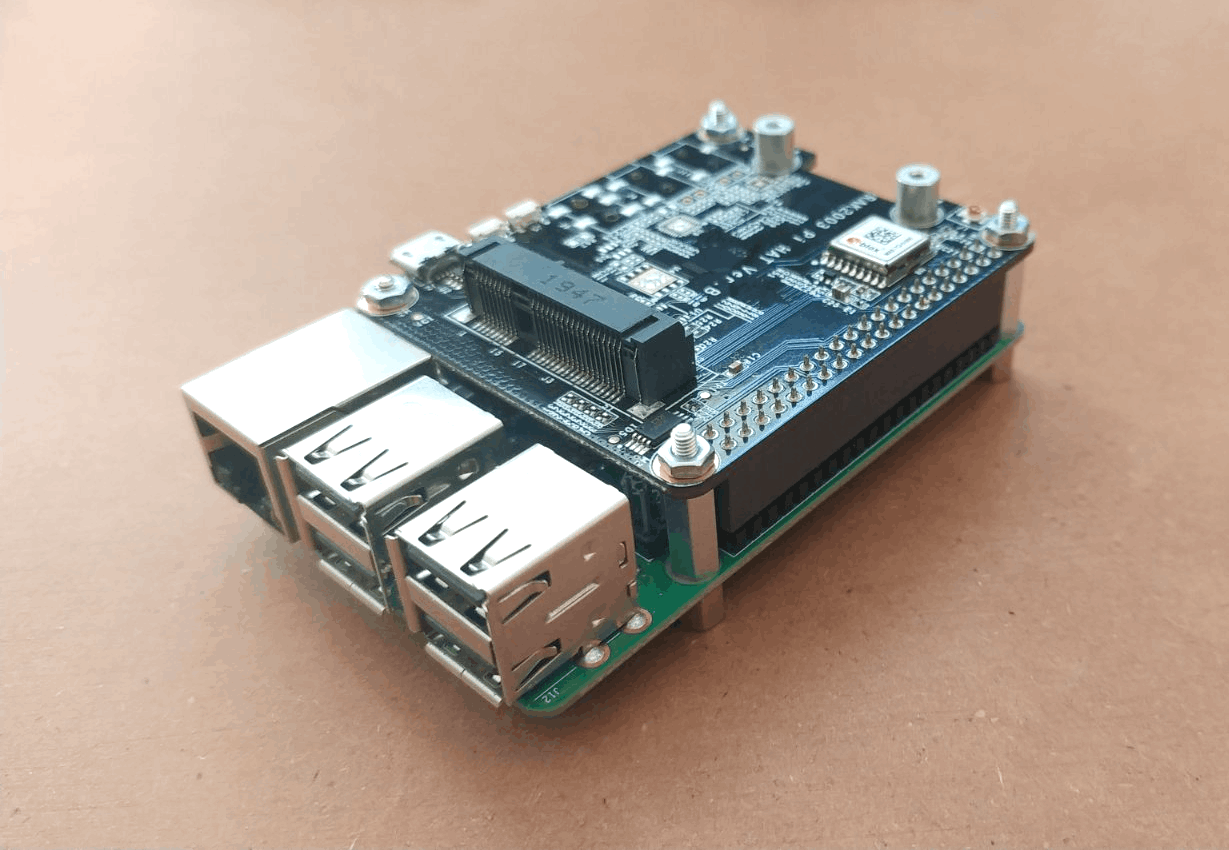
You have the connecting link mounted to the host. It is time to attach the concentrator. Mount the LPWAN concentrator on the Pi HAT. Align and insert the RAK2287 concentrator into the mPCIe slot of the RAK2287 Pi HAT. Make sure the card fits snugly into the connector; it should end up sticking out at a 45-degree angle. Gently press it down and fasten it with 2 screws, the screw holes on the concentrator should match the ones on the Pi HAT.

It is time for antennas. The RAK2287 WisLink LPWAN Concentrator offers two options – with and without GPS, but the GPS is also present since we need the SPI interface. The GPS variant comes with two antennas – GPS and LoRa. Both antennas have pigtail cables with U.FL connectors, which fit into the corresponding labeled ports on the concentrator board. Match each antenna to its port and gently press it until the connectors click together.
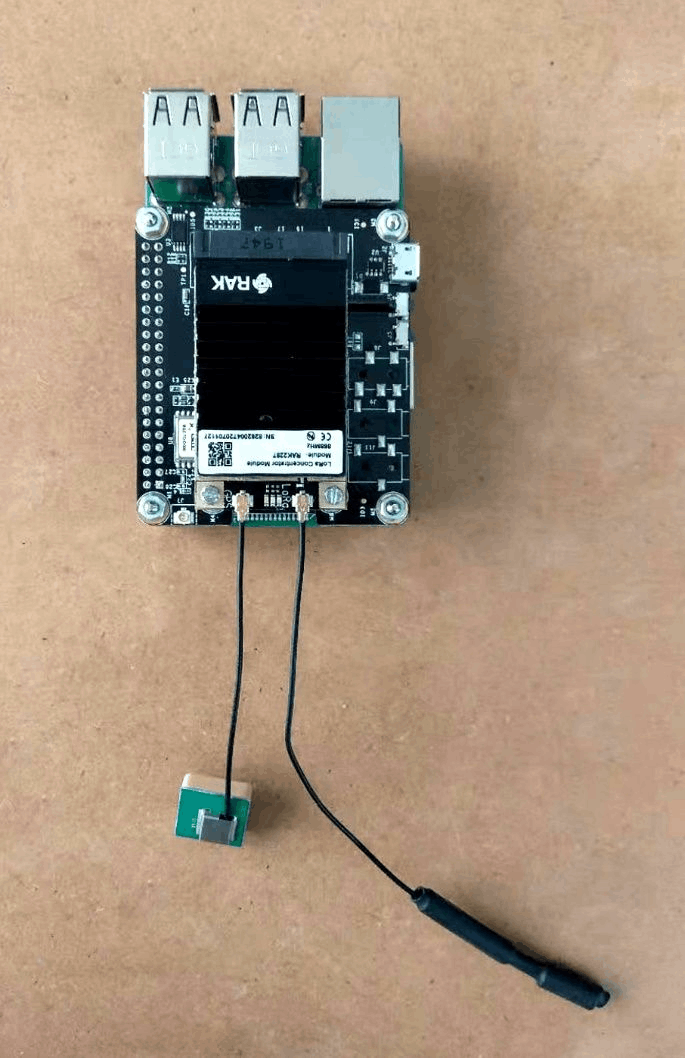
Both antennas that come with the RAK2287 WisLink LPWAN Concentrator are for evaluation purposes only. To use the DIY Gateway for a real use case scenario, the GPS antenna should be positioned outdoors with a clear sky view. Learn more about antennas here.
Your DIY gateway is now assembled! You are done with the hardware, but how about the software? Every device needs one to work!
Here comes the role of the SD card. You need to flash the firmware on it before putting it into your device to make it a gateway.
To do that, you have two options. You can use RAK’s Git repository for Developer Gateways or RAK’s precompiled firmware based on Raspbian OS. The precompiled firmware comes with already installed dependencies. To use the Git repository, you first need to flash a Raspberry Pi OS on the SD card and then install the Git repository. Both options will be considered here; it is up to you which one you will use.
- Using the RAK2287 latest firmware.
- Download the latest firmware for the RAK2287.
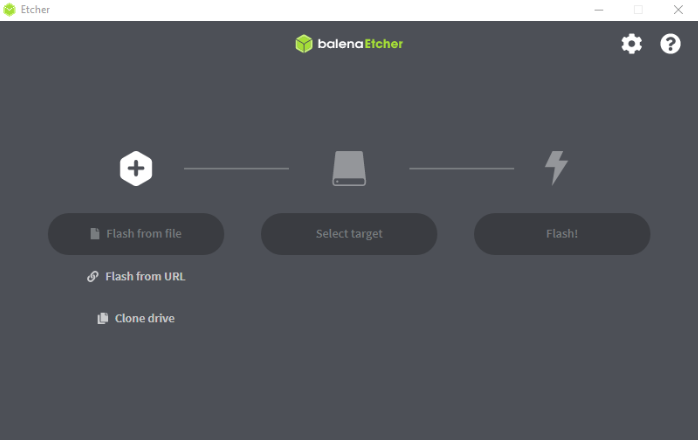
- You can use balenaEtcher or any other image writing tool to flash the firmware on the SD card.
- Follow our Step-by-Step Guide for Flashing an Image on an SD Card.
After the successful flash, it is time to insert the SD card into the slot on the bottom of the Raspberry Pi and power the device. It is recommended to use at least a 2.4 A power supply.

Do not power the device with the antennas detached as it might damage the concentrator.
Have in mind that since this is going to be the first time to boot the OS, it might take a couple of minutes before everything is set up. Just wait a bit.
- Using the Git repository
- Connect the SD card to your PC or laptop via the card reader.
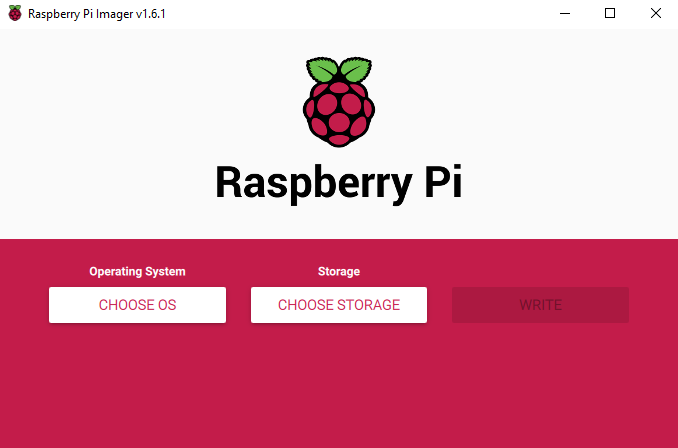
- You will need to download and install the Raspberry Pi Imager.
- Choose the desired OS for the Raspberry Pi from the CHOOSE OS button. For the purpose of this article, you need to choose the RASPBERRY PI OS LITE (32-BIT).
- Choose the SD card from CHOOSE STORAGE button.Click WRITE to flash the SD card.
For this tutorial, we will do a Headless setup on the Raspberry Pi to access the gateway wirelessly.
Here comes the tricky part.
After a successful flash, open the SD card’s root directory and write an empty file named ssh (with no file extension). When it sees the ssh file on its first boot-up, the Raspberry Pi OS will automatically enable Secure Socket Shell (SSH), which will allow you to remotely access the Pi command line from your PC. To setup a Wi-Fi connection on your Headless Raspberry Pi, create a file named wpa_supplicant.conf in the SD card’s directory. In that file fill in the following:
country=your_country_abbreviation
ctrl_interface=DIR=/var/run/wpa_supplicant GROUP=netdev
update_config=1

network={
    ssid="your_network"
    psk="your_password"
    scan_ssid=1
}
Where you must type your country abbreviation (e.g., BG for Bulgaria), the name of your network, and the password of the network, do not remove the quotes.

Insert the SD card into the Raspberry Pi and power on the gateway with the power supply. Now, the Gateway can be accessed via the assigned IP from the DHCP server of the router.
Once you have accessed your gateway via SSH, follow the instructions in the RAKwireless repository to install the gateway firmware to complete the software portion of your gateway build.
The build is complete. Regardless of which method you used to flash the SD card, your LoRaWAN gateway is now ready to be configured. Stay tuned for the next article of this series to learn how to do that as well! Keep reading for the second option in making a DIY gateway.
Configuring a Linux machine to act as a LoRaWAN Gateway
In this case, you don’t need a Raspberry Pi to act as a host because you will make your Linux machine to be the gateway. With this case, we will demonstrate the advantage of having the mPCIe and USB interfaces working together.
For this build, you will need just a few things:
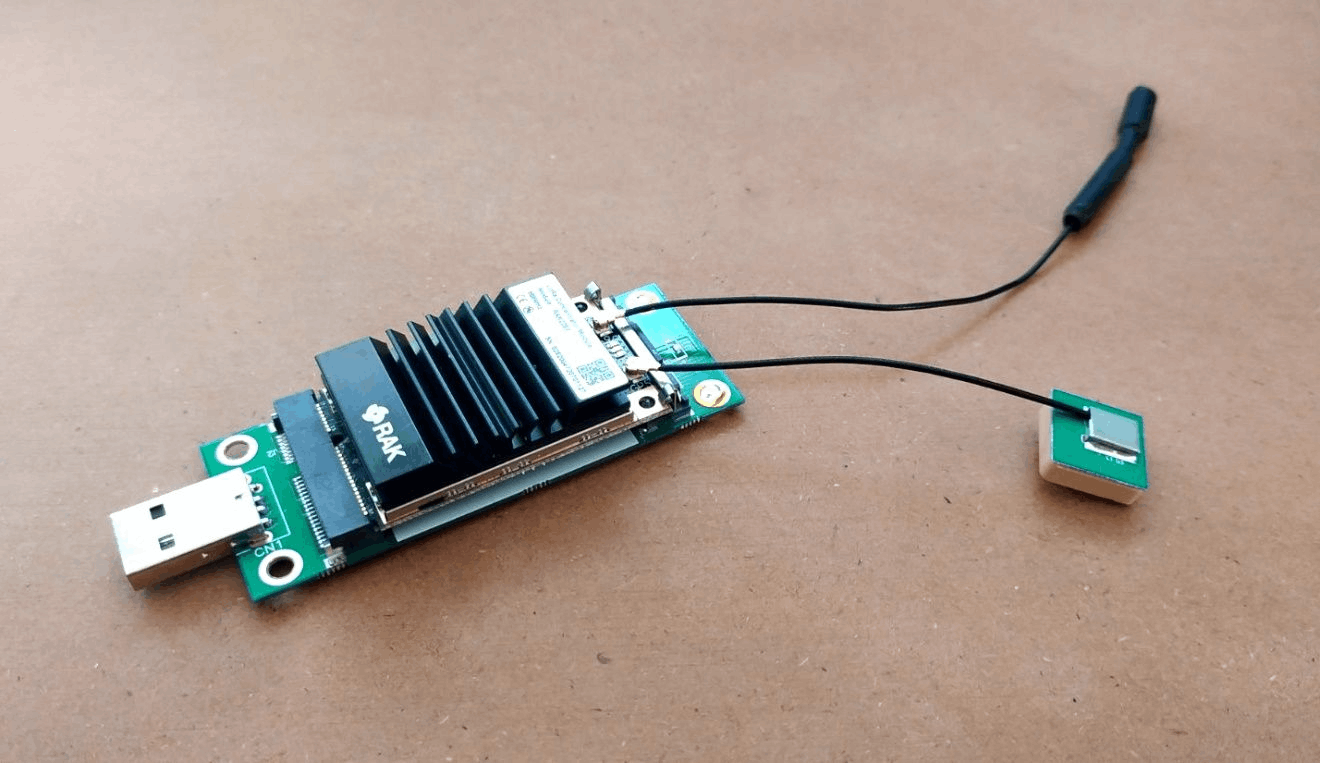
- LPWAN concentrator – again, we will use the RAK2287 WisLink LPWAN concentrator, but only the variant with a USB interface can be used this time.
- mPCIe to the USB board
- LoRa and GPS antenna
- Mac OS / Linux computer
Start with mounting the RAK2287 concentrator on the mPCIe to the USB board. Insert the RAK2287 mPCIe card into the mPCIe slot on the board. Make sure the card fits snugly into the connector; it should end up sticking out at a 45-degree angle. Then, gently press it down until the clip grips the concentrator; no screws are needed.
Match each antenna to its port (again labeled) and gently press it until the connectors click together.
Do not power the device with the antennas not connected as it might damage the concentrator.
The hardware part of the build is done! Plug the USB connector of the board into a computer/laptop to power the concentrator. Your Linux machine should recognize it as a USB device. Make sure that your Linux OS is up to date.
As for the software, you have a few more steps.To be able to install the dependencies for the gateway, you will need to install the gcc and make tools on your machine first. To do this, just run the following commands in the Ubuntu command terminal:
sudo apt install make
sudo apt install gcc
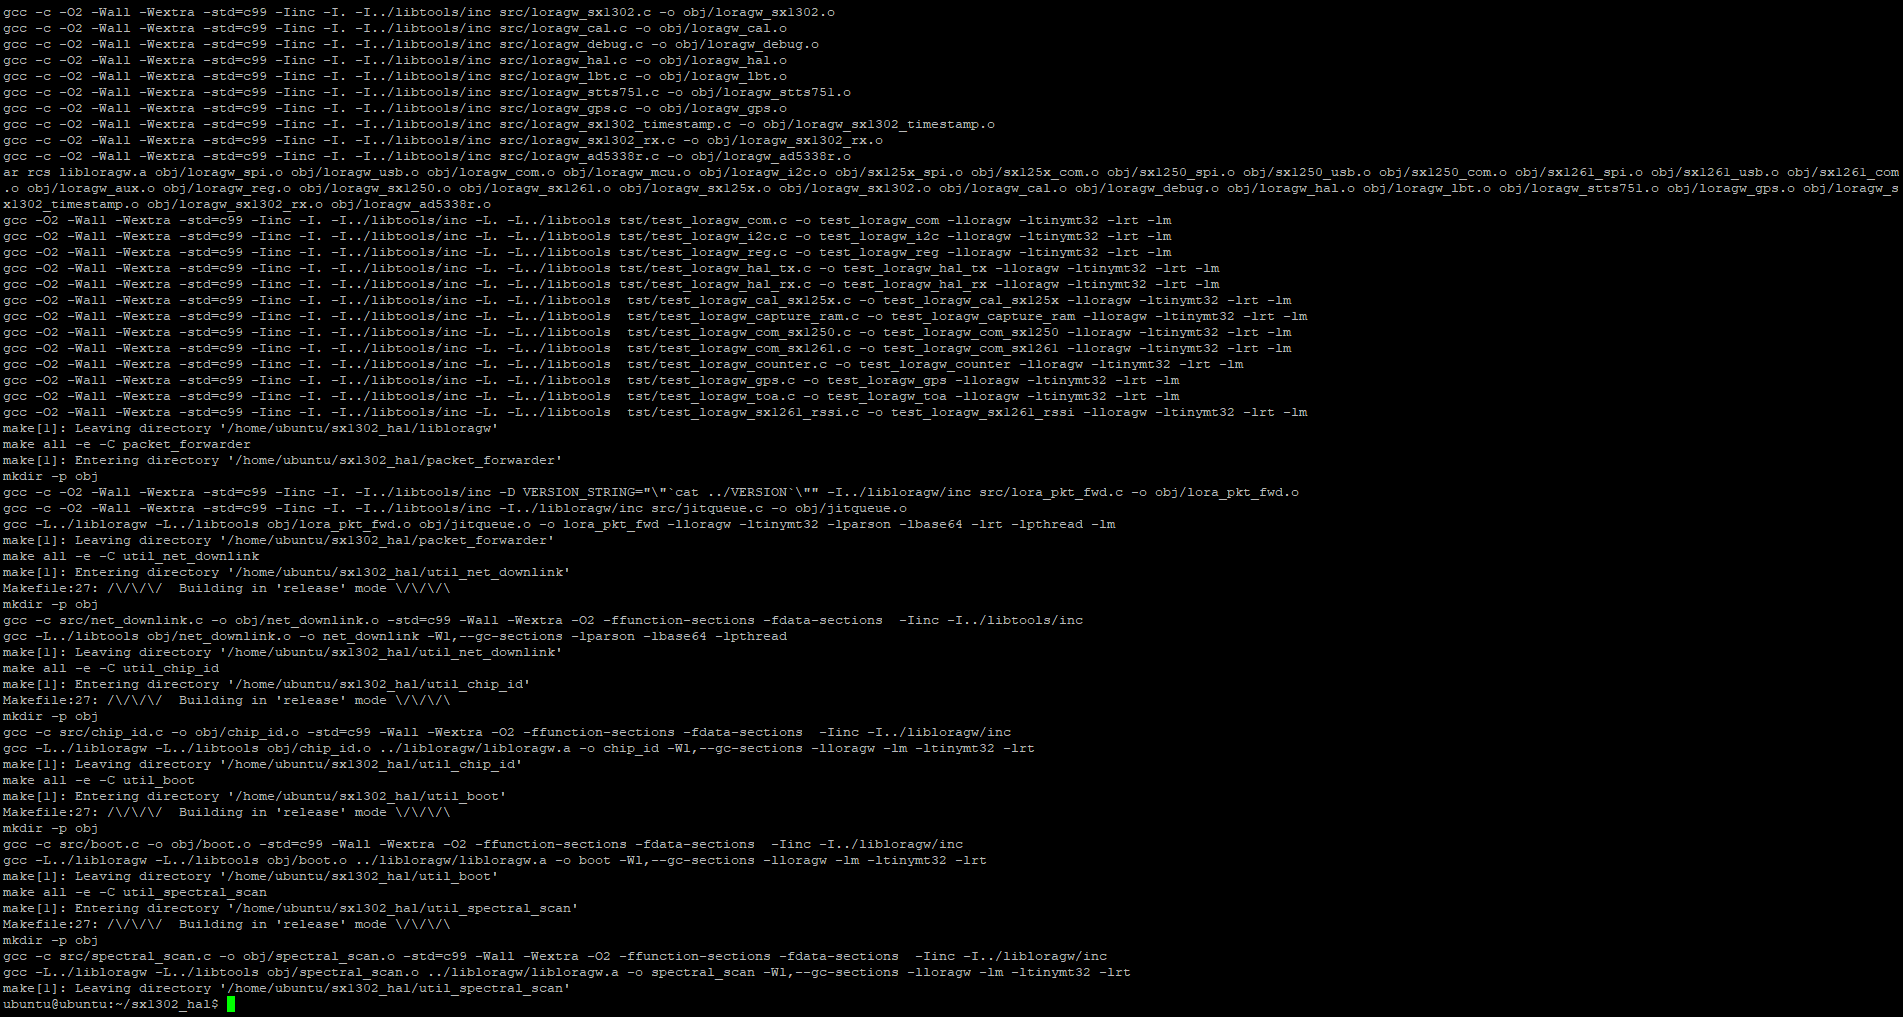
Now, you can proceed with installing the dependencies. Clone the Semtech’s repository sx1302_hal with the command:
sudo git clone https://github.com/Lora-net/sx1302_hal/archive/V2.0.1.tar.gzAfter the download is finished, extract the files with the command:
tar -zxvf V2.0.1.tar.gz
After that enter the folder with
cd sx1302_hal-2.0.1
and simply do a make with the command:
sudo make
Wait a few moments for the installation to finish, and that is it.
Now, you are ready to configure the RAK2287 WisLink LPWAN concentrator with your machine to make it a fully functioning gateway.
As the name of the article suggests, we showed you how to build a gateway. However, this is not enough. Some configuration is needed for both use cases to make them work properly. We will explain the configuration process in our next article. Stay tuned and keep the knowledge-building, RAKstars!

