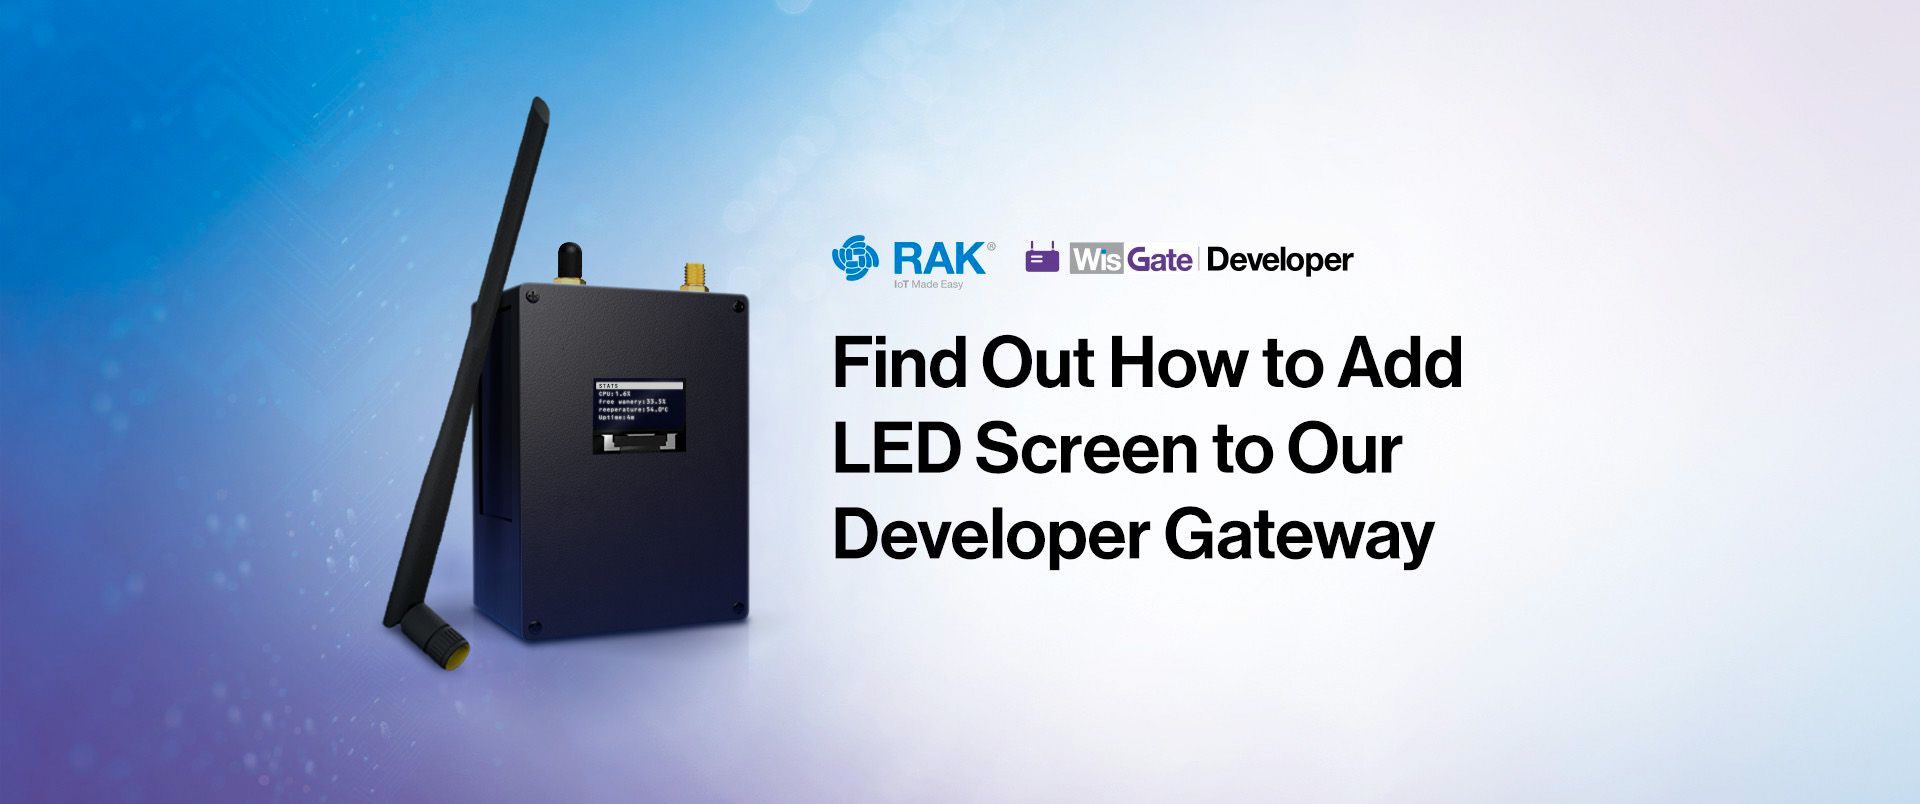
Enhancing the RAK7248 WisGate Developer D4H

The RAK7248 is a compact indoors LoRaWAN Gateway based on the popular Raspberry Pi 4 platform with a RAK2287 Concentrator for LoRaWAN.

It's a great little gateway I use for testing or workshops but you can easily place it in an outdoors enclosure to turn it into an outdoors gateway, although I would probably add some kind of uninterruptible power supply (UPS), or even better a Battery Management System (BMS), to the device to prevent problems with the SD card in case of failure.
As a testing/developer gateway the RAK7248 is simply the best out there. You have full access to the hardware to mount the OS of your choice (Raspberry Pi OS, Ubuntu OS, OpenWRT, Balena OS...) and add pretty much any service you can think of to it. The Raspberry Pi 4 is capable enough to run a full stack LoRaWAN network solution, for instance.
But, of course, there is always room for improvement and I have been toying with an idea I had not long ago. Let's see how it goes...
Not so headless...
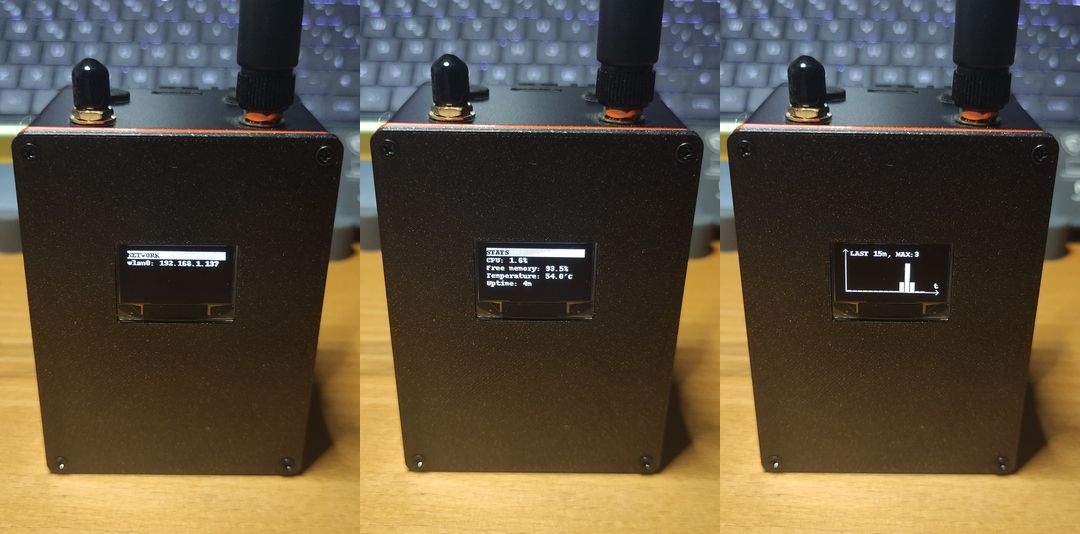
Top one question when first booting a fresh Raspberry Pi is, probably, "what's its IP?". A number of answers are available on the Internet, from "check your router" to "run a nslookup command" or "use Angry IP Scanner". All of these options do their job but they are not what we would call "user friendly"...
What about having the Raspberry Pi tell you its own IP?
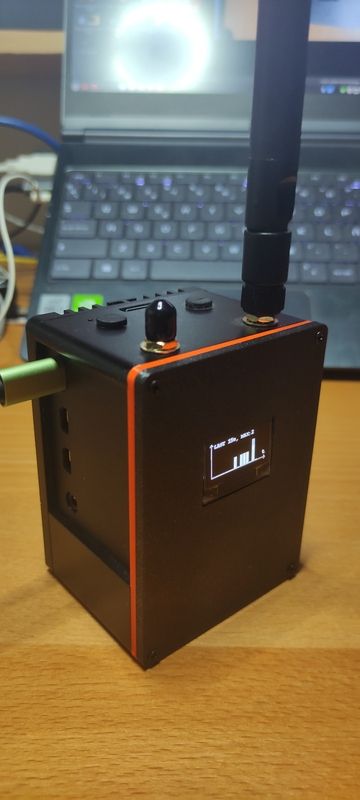
Sure we have seen other products using these small screens and there are hats for Raspberry Pi with OLED screens to do just that, albeit these won't work on the RAK7248 since it would be useless to have the screen inside the enclosure. So we will need some "maker" skills here to add an OLED screen to our Developer Gateway.
Adding an OLED display
There are thousands of displays in the market but we are going to use the RAK1921. It's an OLED display powered by an SSD1306 128 x 64 Dot Matrix OLED/PLED Segment/Common Driver with Controller by Solomon Systech. The screen itself is 0.96 inches, not really big but enough to show some info and stats for the gateway.

OLED Display Solomon SSD1306
RAK1921 is a WisBlock OLED display based I2C SSD1306. A ready-to-use SW library and tutorial makes it easy to visualize data of your WisBlock solution.
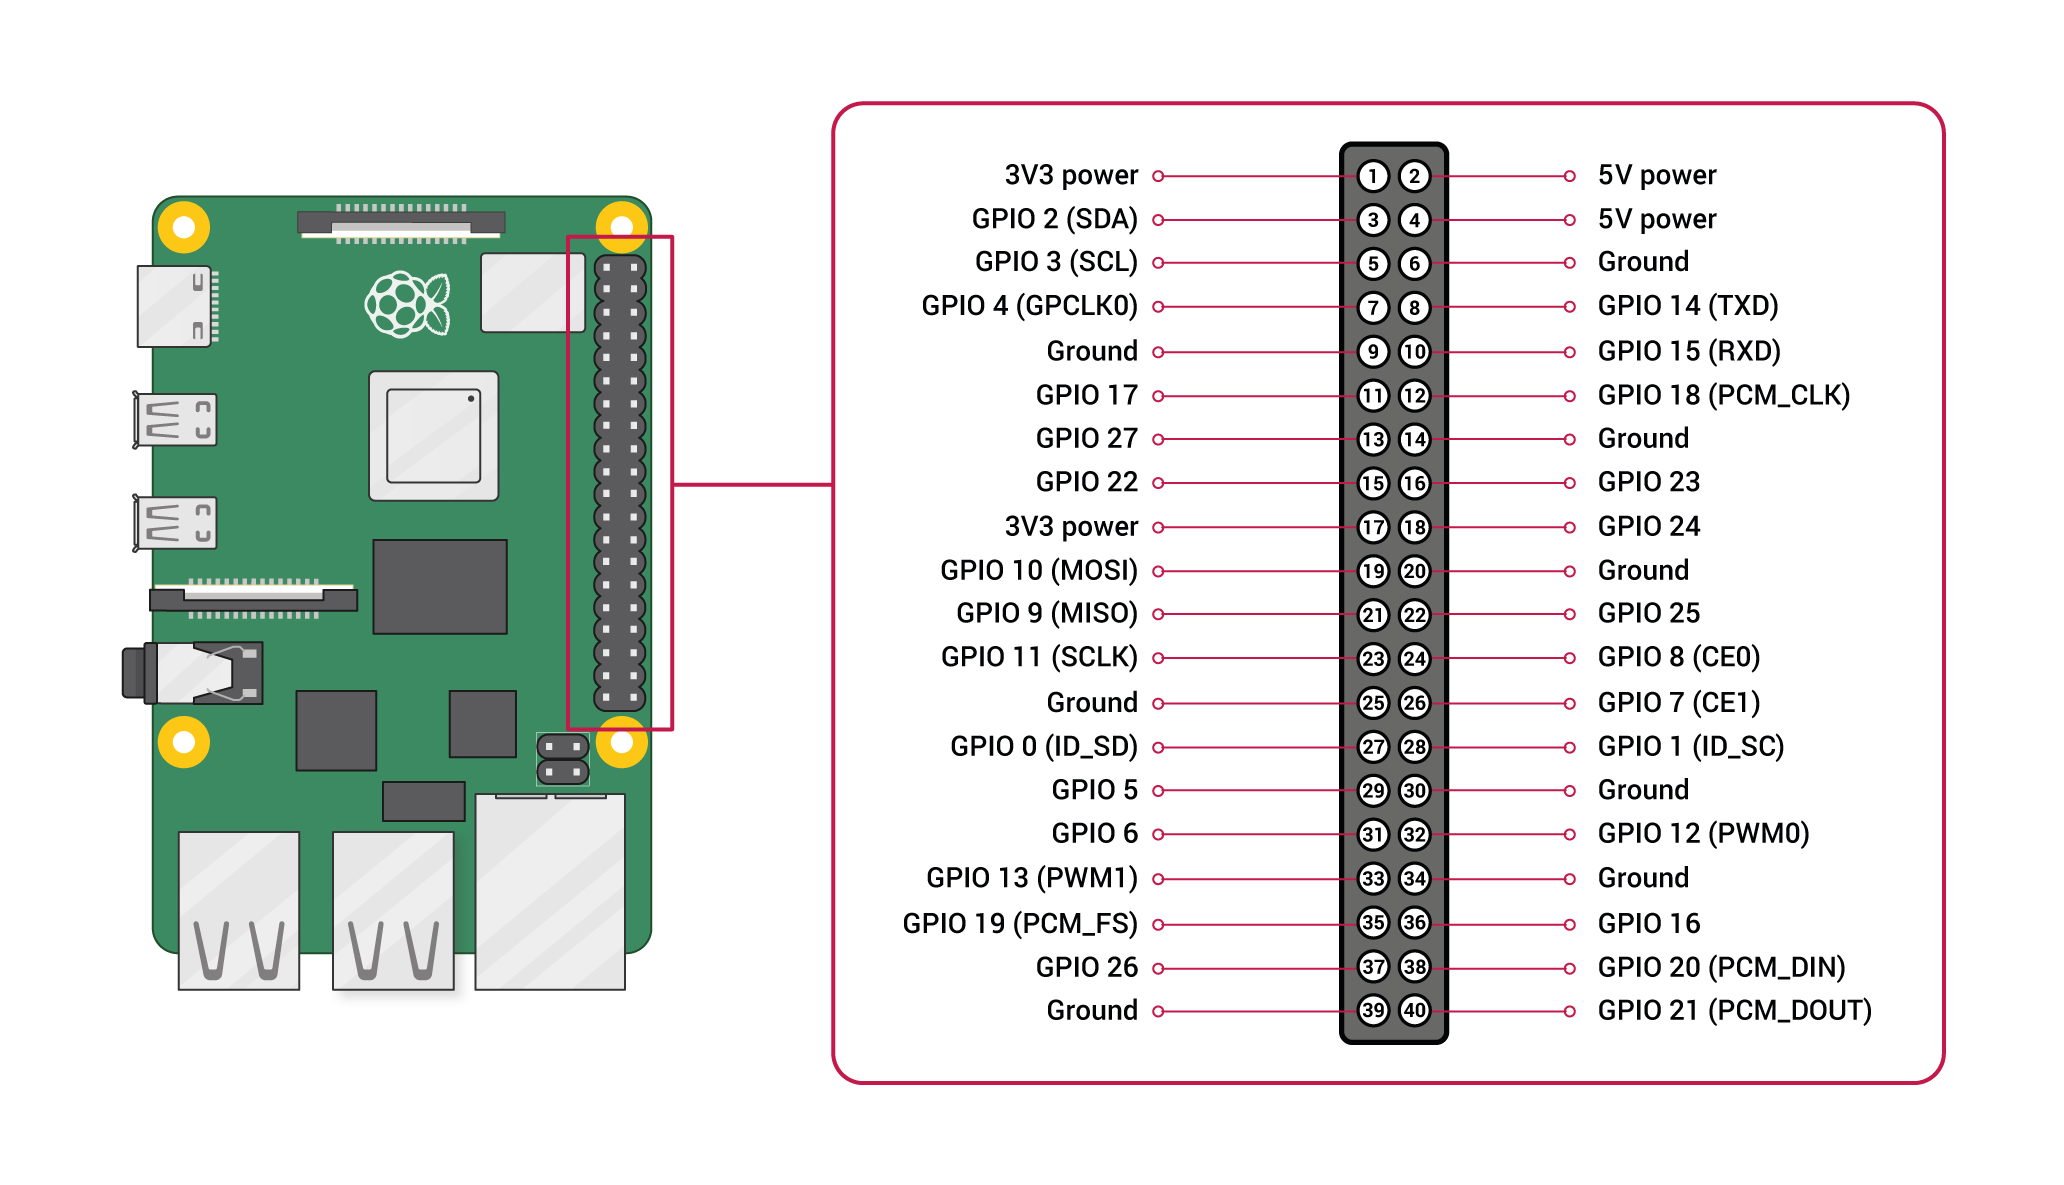
The RAK1921 is an I2C device so we need to wire SDA and SCL in addition to the power lines (it uses 3V3 voltage). Checking the Rasberry Pi header pinout we can see we have these 4 signals on the top-left of the header (pins 1, 3, 5 and 9).
First problem is that the RAK2287 Pi Hat does not have long headers we could use to connect some dupond cables to it. Another option would have been having some kind of I2C interface ready to use but there is none either. So the only option left is to use the iron and weld the four cables directly to the header.
This is not really hard to do, even for the novice at welding. First remove the hat from the RAK748 and the concentrator to avoid problems. Check the Assembly Guide for the RAK DIY Gateway Kit to know how to remove it.
Next add some tin to the target pins (1, 3, 5 and 9), peel off about 2mm from each cables and use a tweezer to hold the tip of the cable in contact to the tin while you heat it. It shouldn't take you longer than a couple of minutes to do them all. Make sure there are no bridges between the pins before placing everything back in the enclosure.
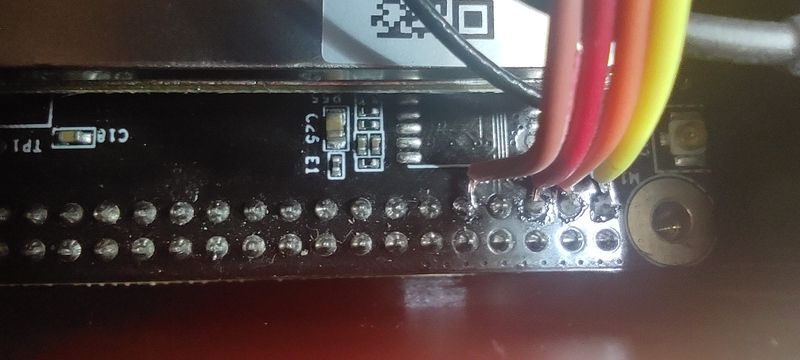
I used a 4 lines dupond cable, chopped off the connectors on one end to weld the cables and left the female dupond connectors on the other end. This way I can easily connect the RAK1921 and start testing.
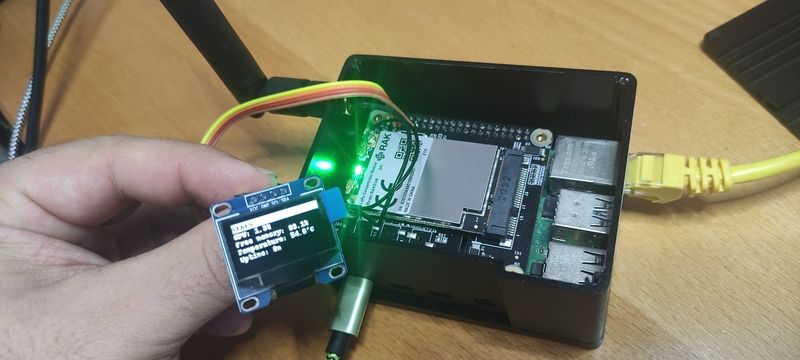
With a little bit of python-fu it's very easy to drive the OLED screen from the Raspberry Pi. So first task was to report the device IP and also some stats like CPU load, free memory, CPU temperature and uptime. You can find the code for it at the end of this post.
Wrapping it up with a little of 3D printing
Now that we have the screen connected and showing some information let's make it nicer.
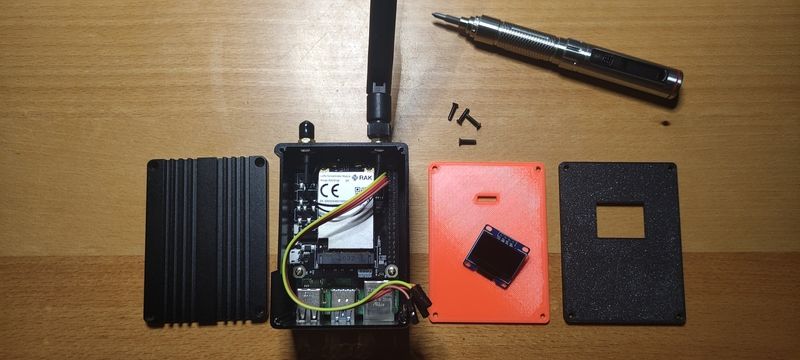
My take was to replace the top aluminium lid with a 3D printed version that includes a window for the OLED screen. I was wondering how to fix the OLED screen to the plastic: screws, fasteners...? Finally I decided to use an approach I had used in the past, using a sandwich of 2 layers, the bottom one providing mechanical support and the top layer housing the RAK1921 PCB.
This approach also lets me print both layers in different colors (black for the outer layer, just like the enclosure itself, and orange to the inner layer). This adds a colour note to the final design that - in my opinion - looks really nice.
To design the layers I used OpenSCAD, a programmable 3D modelling software and a caliper to measure the lid and the RAK1921. Check the "resources" section below for the 3D printing files.
Parsing the Packet Forwarder logs
As you might have noticed in the last picture above, I have not only added code to show the IP or the stats of the device, but also some basic information about LoRaWAN RX packets.
To do so I have used a small script that parses the logs from the Basics™ Station process running inside a Docker container. You can check my previous post about how to setup Basics™ Station on RAK WisGate Developer Gateways in the link below:

The script parses the logs and keeps some stats about messages received and sent inside time buckets. Then you can get those values using a simple HTTP request in JSON format.
# this will start monitoring a local container named `basicstation` and expose port 8888 for GET requests
> python -u log2api.py

# run this command on a separate terminal to check the output of the API (buckets are numbered in chronological order):
> curl -s http://127.0.0.1:8888/api/metrics
{
  "bucket_count": 15,
  "bucket_size": 60,
  "buckets": {
    "0": {
      "rx": 2,
      "tx": 0
    },
    "1": {
      "rx": 1,
      "tx": 1
    },
    "5": {
      "rx": 1,
      "tx": 1
    },
    "7": {
      "rx": 1,
      "tx": 0
    },
    "8": {
      "rx": 1,
      "tx": 0
    },
    "9": {
      "rx": 1,
      "tx": 1
    },
    "10": {
      "rx": 1,
      "tx": 0
    },
    "11": {
      "rx": 1,
      "tx": 1
    },
    "13": {
      "rx": 0,
      "tx": 0
    }
  },
  "totals": {
    "rx": 16,
    "tx": 7
  }
}
The code for this script can be found at the Packet Forwarder Loggers repo. There is also a `docker-compose.yml` file you can use to run this as a container and forget about dependencies. Check the YAML file to see the default values which are holding 15 buckets of 60 seconds each, which means that it will keep stats for the last 15 minutes grouped minute by minute. You can change that to match your needs.
Now that we have a process running that monitors the stats for the packet forwarder we can focus on showing them in the OLED screen. In the "resources" section below you have a link to the code I'm using. Basically it calculates the width and height of each column based on the number of buckets available (there is a limit of 36 buckets due to the size of the screen) and the maximum number of packets received for one bucket. All these data is reported by the API.
Given that the OLED screen is monochrome and not big enough I have decided to only show RX packets to get an estimate of the LoRaWAN activity. Other metrics could also be very interesting, like distribution of packets per channel or spreading factor or even top devices.
Conclusions
This small hack enhances the RAK7248 WisGate Developer with a very useful small screen that reports basic stats on the device and the LoRaWAN network. It was fun doing it because it involves several skills: some basic welding, 3D design and printing and programming, and at the same time is not too complex. The project was done during a summer Sunday afternoon.
But the best thing about hacks is that they allow you to prototype ideas with what you have at hand, and who knows, maybe these ideas will be part of a future product...
Also, I have been talking all the time about the RAK7248 WisGate Developer D4H but the D3/D3+ and D4/D4+/D4P are 100% compatible with this hack, including code and 3D printed parts, since they all use the same enclosure (just check if there is enough room in the enclosure for the cable and the RAK1921 headers). Check them out here: https://store.rakwireless.com/collections/wisgate-developer.
Resources
The OpenSCAD files for the 3D printed parts can be found in this repo on GitHub:
 xoseperez
The python code to show the IP, stats and packets is based on work by Kai Xi 郗锴, Sheng Lyu 吕晟, Taylor Lee 李远朝 and myself, all from the RAKWireless team. It will soon be released as part of a broader project but in the meantime you can find it in the same repo above.
The Packet Forwarder parsers can be found in the repository below. I have showcased it parsing BasicStation logs and exposing them as an HTTP API but in the repo you can find examples using the Legacy Packet Forwarder by Semtech and also exposing the data via MQTT, plain JSON or sending it directly to an InfluxDB database.
xoseperez