How to Reduce the Power Consumption of WisBlock Solutions?

While the WisBlock Core RAK4631 is built on the low power Nordic nRF52840 MCU and the low power LoRa® transceiver Semtech SX1262, having both of them active all the time is not ideal for battery-supplied solutions.
Here I want to give some tips and two examples on how to reduce the power consumption. We will do this by using FreeRTOS features tasks and semaphores. The Arduino BSP for the nRF52 MCU's is a wrapper of Nordic's SDK which is based on FreeRTOS.
Both the MCU and the LoRa transceiver offer sleep mode that can reduce the consumption significantly. But it is not obvious how to use sleep mode when using the Arduino framework to write your application. There is no sleep() command available.
But there are methods made available from the underlaying FreeRTOS OS that can be used to send a task into sleep mode. And when all tasks are in sleep mode, the MCU is going into low power sleep mode. It is not as perfect implemented as on the ESP32 MCU's where specific sleep functions can be called. But there are several methods, and here we will have a look into two of them. One is using the delay function, the other one is using semaphores in your application.
delay(milliseconds)
This command will send the task into sleep for x milliseconds. This sounds easy to use, however, is not very practical. Because while in the delay() function, the task cannot receive any information about external events, like an interrupt from a sensor or a 9DOF sensor. So for most scenarios the delay is not a good solution.
xSemaphoreTakeBinary(semaphoreHandle, portMAX_DELAY)
FreeRTOS provides semaphores to control task switches and let tasks sleep while waiting for an event. Looking into the FreeRTOS documentation, you can see there are several types of semaphores, named binary, counting, mutex and recursive mutex. To keep things simple here, I will use the binary semaphore in this example.
How do semaphores work?
I am here citing the FreeRTOS documentation:
Think of a binary semaphore as a queue that can only hold one item. The queue can therefore only be empty or full (hence binary). Tasks and interrupts using the queue don’t care what the queue holds – they only want to know if the queue is empty or full. This mechanism can be exploited to synchronise (for example) a task with an interrupt.
Consider the case where a task is used to service a peripheral. Polling the peripheral would be wasteful of CPU resources, and prevent other tasks from executing. It is therefore preferable that the task spends most of its time in the Blocked state (allowing other tasks to execute) and only execute itself when there is actually something for it to do. This is achieved using a binary semaphore by having the task Block while attempting to ‘take’ the semaphore. An interrupt routine is then written for the peripheral that just ‘gives’ the semaphore when the peripheral requires servicing. The task always ‘takes’ the semaphore (reads from the queue to make the queue empty), but never ‘gives’ it. The interrupt always ‘gives’ the semaphore (writes to the queue to make it full) but never takes it.
How do we use semaphores to reduce the power consumption?
We create separate tasks to handle different events. One task is always created when using the Arduino Framework, the loop() function (referred to in the following paragraphs as loopTask). And we will create a second task to handle all LoRa/LoRaWAN events. We call this second task the loraTask.
Whether any of the two tasks is active is controlled by semaphores.
For the loopTask, we create a semaphore called taskEvent. The task will be only active if taskEvent is available. The semaphore is made available by two different events:
- a timer event which wakes up the
loopTaskevery 2 minutes to send a status message. - after a packet was received over LoRaWAN or LoRa P2P
And for the loraTask we create a second semaphore, called loraEvent. The task handling the LoRa communication will be only active if
- a package was received and triggered an interrupt signal
- the
loopTaskwants to send a package.
In the example code both taskEvent and the loraEvent semaphores are taken by the setup() function before the loopTask and the loraTask are started. Once the two tasks are started, they will call xSemaphoreTake(semaphore, portMAX_DELAY). The first parameter is the semaphore the task wants to take, the second parameter is the time the task will wait for the semaphore to be available. portMAX_DELAY means that the function will not return until the semaphore is given. As both semaphores are taken by the setup task, both tasks go to sleep! And that means that the nRF52840 will start the sleep mode as well.
How to put the LoRa transceiver into sleep mode?
The way to reduce power consumption is different depending if the LoRaWAN protocol is used or if the application is using a simple LoRa P2P (point to point) communication.
LoRaWAN
If the application is using the LoRaWAN stack, the power consumption depends very much on which LoRaWAN class the node is configured. As a Class A node, the LoRa transceiver is hold in sleep mode all the time. Only if the application is sending a packet to the LoRaWAN server, the transceiver is waking up. After successful sending the packet, the LoRa transceiver will go into RX mode, because there are two RX windows defined for Class A nodes. The LoRaWAN server can use these RX windows to send a packet to the node.
But if the node is configured as a Class C node, the LoRa transceiver has to be in RX mode all the time. Because a Class C node must be able to receive a packet from the LoRaWAN server at any time, independent if he sent a package or not.
So for battery powered application it is a bad idea to configure a node as Class C.
LoRa P2P
How much power can be saved depends on the requirements of your application.
Scenario 1 Sending only
In this scenario a node is only sending a packet frequently, but does not need to receive any data from the other nodes.
To achieve the maximum power savings, the LoRa transceiver is kept in sleep mode all the time. Only if the application needs to send a packet, the transceiver wakes up and stays awake until the packet is sent. Then it goes back into sleep mode.
Scenario 2 Sending and Receiving
In this scenario the node wants to receive packets from other nodes at any time. So it should stay in RX mode unless a packet is sent from the application. After successful sending, it will go back to RX mode. The power consumption in RX mode is lower than in TX mode, but it is not as low as in sleep mode.
To improve the power consumption, Semtech implemented in the SX1262 LoRa transceiver a special RX method. This method is called RxDutyCycle.
What is the difference between RX mode and RxDutyCycle mode?
- In RX mode the transceiver stays in active all the time, listening to incoming packets.
- In RxDutyCycle mode the transceiver loops between a short RX time and a longer sleep time.
The principle of the RxDutyCycle is to put the transceiver in RX mode and listen if any packet preamble can be detected. If no preamble is detected, the transceiver goes into sleep mode. If a preamble is detected, the transceiver stays in RX mode to receive the complete packet and then raises the interrupt line to wake up the attached MCU.
The RX and sleep times of the RxDutyCycle need to be calculated carefully depending on the length of the preamble and the length of a single symbol. If the sleep period is chosen longer than the preamble length it can happen that the LoRa transceiver misses a packet. You can find more detailed information in Semtechs documentation SX1261_AN1200.36_SX1261-2_RxDutyCycle_V1.0
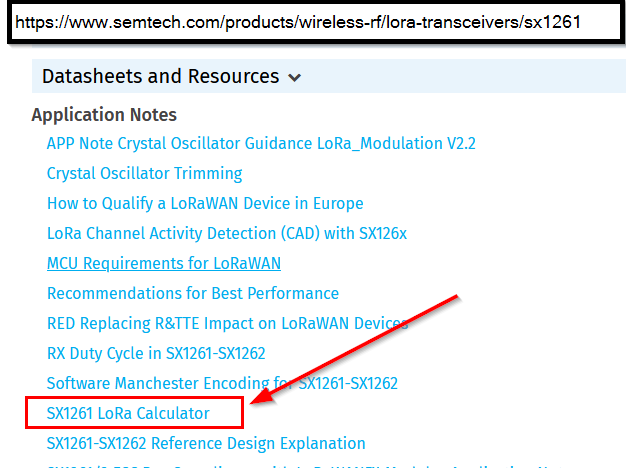
To calculate these value, the SX1261 Calculator Tool is perfect. You can download the tool from Semtechs web page.
When you start the calculator, you can enter all parameters for the LoRa transmission. Then it will show you the number of symbols for the preamble and the length of a symbol.
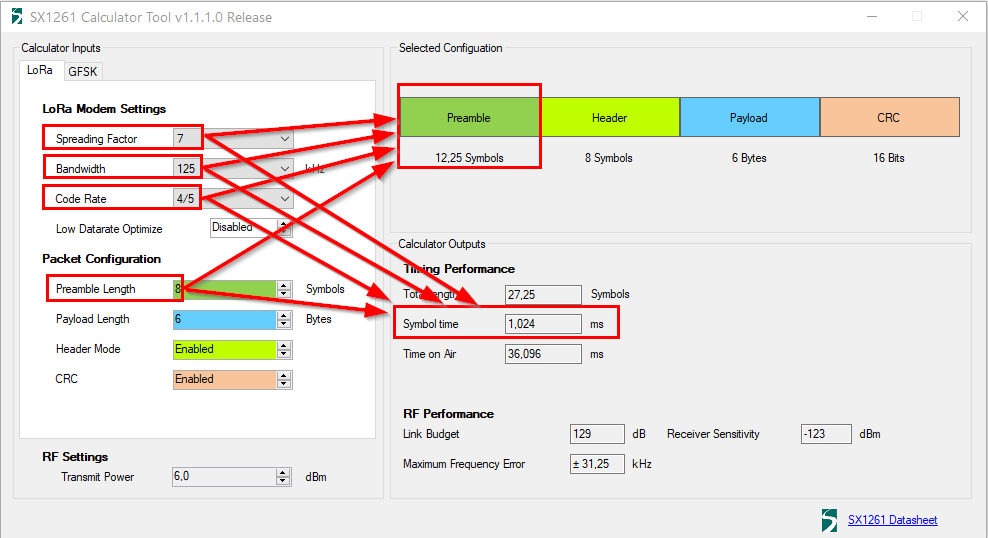
In order to detect the preamble of a packet, the transceiver should be in RX mode for the length of at least 2 symbols and should not sleep longer than the length of the complete preamble.
The formula to calculate the times:
RX time: 2 symbols * symbol length * 1000 * symbol time * nRF clock divider
Sleep time: # of preamble symbols * symbol length * 1000 * nRF clock divider
nRF clock divider is fixed to 15.625
symbol length calculated for Spreading Factor 7, Bandwidth 125kHz, Coding Rat 4/5 is 1.024 ms.
So the RX time is 2 * 1024 * 1000 * 15.625 and the sleep time is 10 * 1024 * 1000 * 15.625.
Code example
We have full code examples available for both LoRaWAN and LoRa P2P:
Principal of the code
The loopTask
In setup() we create the semaphore for the loopTask and take the semaphore, so that the task will not start immediately. We start as well a timer that will wake up the loopTask frequently to send its status:
void setup()
{
    // Create the loopTask semaphore
    taskEvent = xSemaphoreCreateBinary();
    // Initialize semaphore
    xSemaphoreGive(taskEvent);

    ... // do other initialization

    // Start the timer that will wakeup the loop frequently
    taskWakeupTimer.begin(SLEEP_TIME, periodicWakeup);
    taskWakeupTimer.start();

    // Take the semaphore so the loop will go to sleep until an event happens
    xSemaphoreTake(taskEvent, 10);
}
In addition a callback function is required that will be called by the timer. This task just gives the loopEvent semaphore and enables the loopTask to run:
void periodicWakeup(TimerHandle_t unused)
{
  // Give the semaphore, so the loop task will wake up
  xSemaphoreGiveFromISR(taskEvent, pdFALSE);
}
In the loopTask we try to get the semaphore, which will put the task to sleep until either a timer event or a received package will give the semaphore and start it. After all required processing is finished, we take the semaphore again. This will put the loopTask back to sleep:
void loop()
{
    // Sleep until we are woken up by an event
    if (xSemaphoreTake(taskEvent, portMAX_DELAY) == pdTRUE)
    {

        ... // do stuff here

        // Go back to sleep
        xSemaphoreTake(taskEvent, 10);
    }
}
The loraTask
In the LoRa initialization function we create the semaphore for the loraTask and take the semaphore, so that the task will not start immediately.:
void initLoRa()
{
    // Create the LoRaWan event semaphore
	loraEvent = xSemaphoreCreateBinary();
	// Initialize semaphore
	xSemaphoreGive(loraEvent);

	... // initialize LoRa P2P

	// In deep sleep we need to hijack the SX126x IRQ to trigger a wakeup of the nRF52
	attachInterrupt(PIN_LORA_DIO_1, loraIntHandler, RISING);

	// Take the semaphore, so loop will be stopped waiting to get it
	xSemaphoreTake(loraEvent, 10);
}
The LoRaWan initialization looks a little bit different, as we start the Join procedure at the end. To handle the Join procedure, the loraTask has to be enabled. Therefore we are not taking the semaphore immediately. The loraTask will start sleeping after the Join process has been finished.
void initLoRa()
{
    // Create the LoRaWan event semaphore
	loraEvent = xSemaphoreCreateBinary();
	// Initialize semaphore
	xSemaphoreGive(loraEvent);

	... // initialize LoRa P2P

	// In deep sleep we need to hijack the SX126x IRQ to trigger a wakeup of the nRF52
	attachInterrupt(PIN_LORA_DIO_1, loraIntHandler, RISING);

	// Start Join procedure
	lmh_join();
}
As you can see, we are re-assigning the interrupt handler for the interrupt signal DIO1 to our own function loraIntHandler(). Normally the interrupt signal is handled inside the LoRa library, but to be able to wake up the loraTask we need to use our own interrupt handler.
The interrupt handler is only giving the semaphore, so that the loraTask is waking up and can handle the LoRa event.
void loraIntHandler(void)
{
	// SX126x set IRQ
	if (loraEvent != NULL)
	{
		// Wake up LoRa task
		xSemaphoreGive(loraEvent);
	}
}
The loraTask will try to get the semaphore and start sleeping until a LoRa event happens and wakes it up, so it can handle the event:
void loraTask(void *pvParamters)
{
    while(1)
    {
        if (xSemaphoreTake(loraEvent, portMAX_DELAY) == pdTRUE)
        {
            // Handle Radio events with special process command!!!!
            Radio.IrqProcessAfterDeepSleep();
        }
    }
}
Each of the LoRa event callback functions take the semaphore after the LoRa event was handled and send the loraTask back to sleep.
void OnTxDone(void)
{
    // handle TX done

    // Send LoRa handler back to sleep
    xSemaphoreTake(loraEvent, 10);
}
In OnRxDone() we wake up the loop task so that the received data can be handled:
void OnRxDone(void)
{
    // handle RX done

    // Notify loopTask about the event
    xSemaphoreGive(taskEvent);

    // Send LoRa handler back to sleep
    xSemaphoreTake(loraEvent, 10);
}
Conclusion
So as you can see, semaphores are a good tool to keep your task sleeping while they are not needed and help to reduce the power consumption of your application.
Two examples of low power consumption that I could achieve by using semaphores and task sleep. In both cases the node was sending a 14 byte long packet every 10 seconds. The shown consumption is in between sending of a packet. During TX phase these values are significantly higher:
In LoRa P2P TX only mode: ~120uA
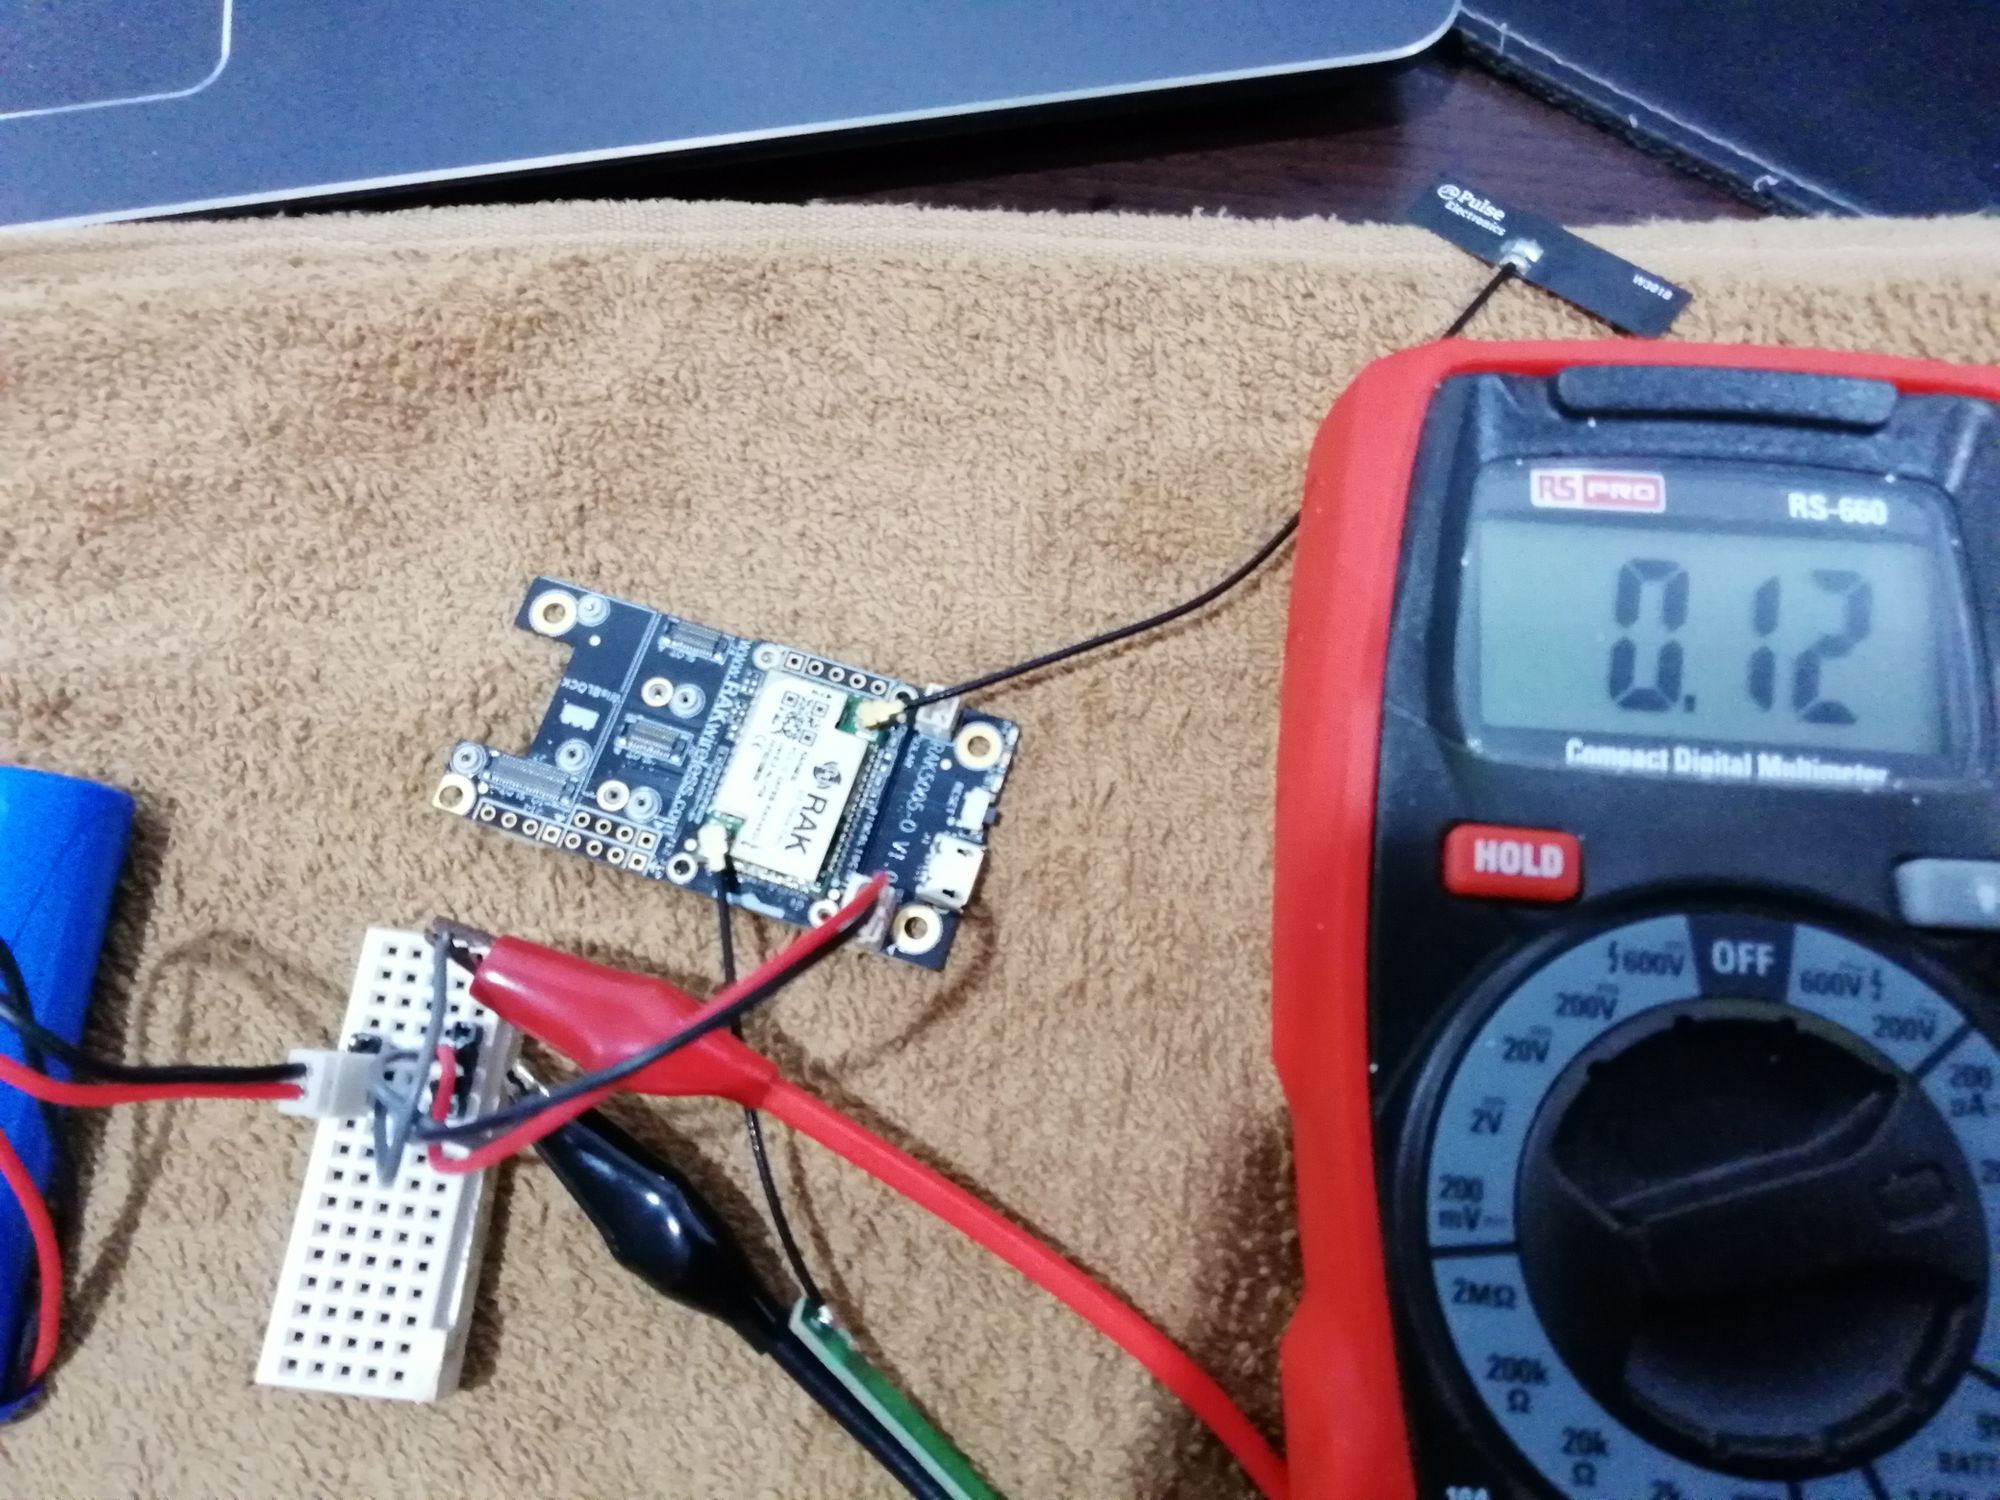
In LoRa P2P TX/RxDutyCycle mode: ~6mA
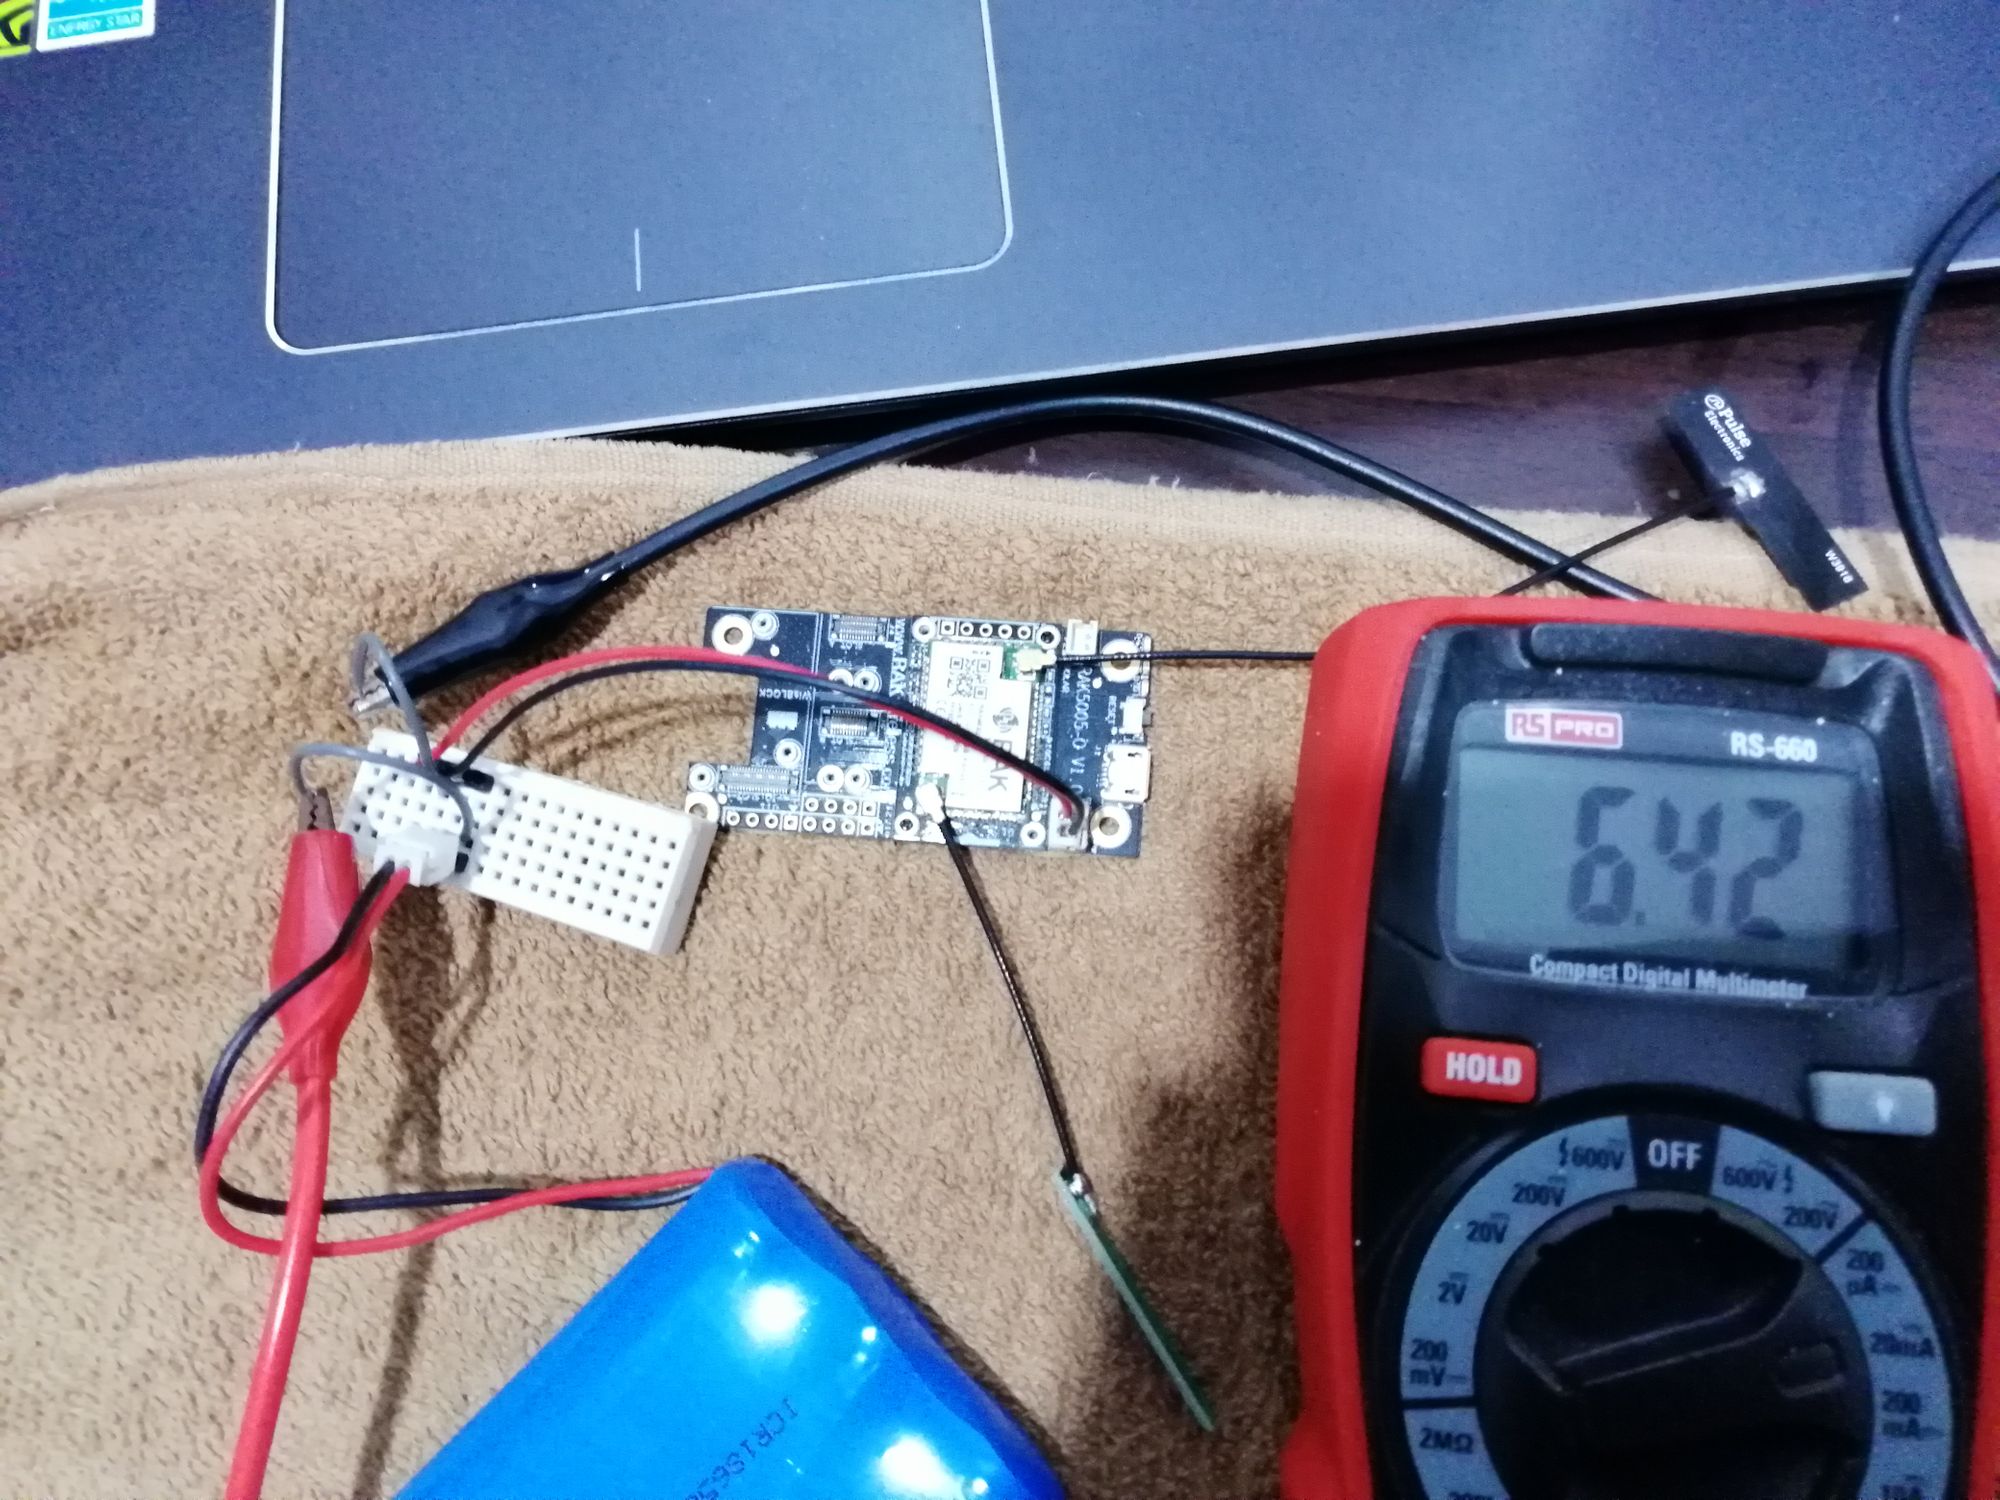
REMARK
The above power consumption was measured with one board – no sensors attached and six other nodes sending on the same frequency. The results will vary depending on variances of your boards and how many other nodes are using the same frequency (for RxDutyCycle mode).
The consumption is as well depending on the charging level of your battery. The lower the voltage, the higher the current.
Want to know more about the concept of WisBlock? Download the e-book here.