

Connect the Dots: Linking LPWAN (LoRaWAN) devices to Ubidots

Gateways and nodes are not the only participants in the operations of the Internet of Things (IoT). For things to connect in IoT, users must understand the environmental data gathered from LPWAN nodes. Data then must be organized and analyzed. If left untouched, data will never be understood by users and devices - data becomes unusable. With the help of IoT platforms, presenting digital information from our environment in an understandable approach becomes simple. Users can even configure and monitor specific assets from anywhere in the world just by using any Internet-enabled device (e.g. computers and mobile devices).
Known among these IoT platforms is Ubidots. The data analytics and visualization provided by the platform of Ubidots turn real-time sensor data into information that is designed for educational research, business decisions, and machine-to-machine interactions. The accurate visualization that the platform executes makes use of graphs, charts, tables, indicators, maps, metrics, and widgets. The platform also allows users to control devices from afar.
Apart from the ease of data configuration that Ubidots offers, Ubidots also features easy integration of its platform to IoT devices and servers. Taking either RAK7249 or RAK7258 from the leading IoT solutions provider, RAKwireless, as the sample gateway, and RAK7204 as the sample node of our set-up, you can follow the instructions below in smoothly integrating Ubidots into your deployment. This example is applicable to any LPWAN node and gateway combination as long as the node is sending the LPP payload format, and The Things Network (TTN) is configured to decode it properly and works with Ubidots.
Set up your gateway
Attach the antennas (i.e. Wi-Fi, LPWAN, LTE, and GPS) found on your gateway. For RAK7258, attach those to the SMA connector, and for RAK7249, screw the antennas onto the gateway. After this step, you can now turn on the gateway. RAK7258 uses as 12V DC adapter the best and a cable and injector for RAK7249. Once powered, you may use either the ethernet Port or Wi-Fi to connect the gateway. Both of these options let you access the Management UI via a web browser in which you can see the gateway’s EUI (see Figure 1).
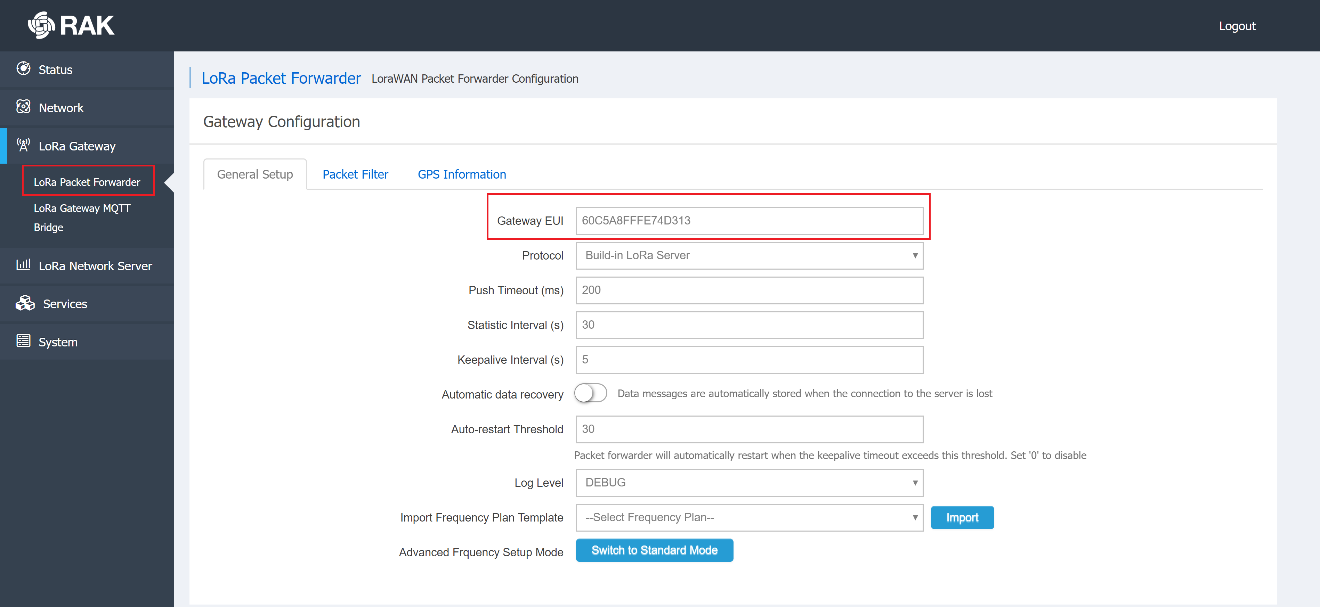
Figure 1 | Gateway Configuration – Gateway EUI
Connect the gateway to TTN by heading on to https://www.thethingsnetwork.org/ and creating an account. Go to your TTN console and register your new gateway: https://console.cloud.thethings.network/. Make sure to select the “I’m using the legacy packet forwarder” option before entering the Gateway EUI. Select your frequency plan depending on your location and this should populate the router field.
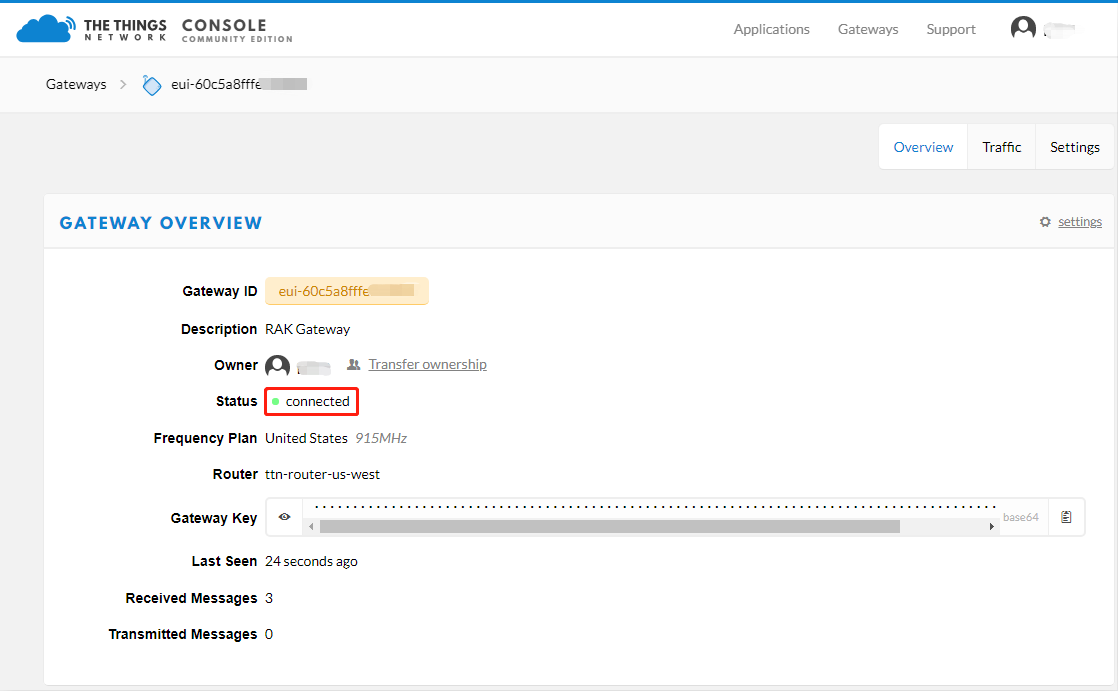
Figure 2 | Gateway Overview – Status connected
Set up your nodes
With your same TTN account, go to “APPLICATIONS” and fill-out the necessary information such as app ID, description, app EUI, and handler registration to add an application. Register your device by also providing the node’s device ID and EUI. Depending on which authentication method you want to use, proceed to either the OTAA mode or the ABP mode section. For further information on the instructions, you may see this document from RAKwireless online.
Set up TTN and Ubidots to work together
Since RAK7204 nodes are preconfigured to use the LPP data format standard, you only need to change the payload format of your application to Cayenne (see Figure 3). In case you are not using RAK7204 nodes, you can always write a custom decoder or encoder to have the same effect as using the built-in Cayenne LPP one.
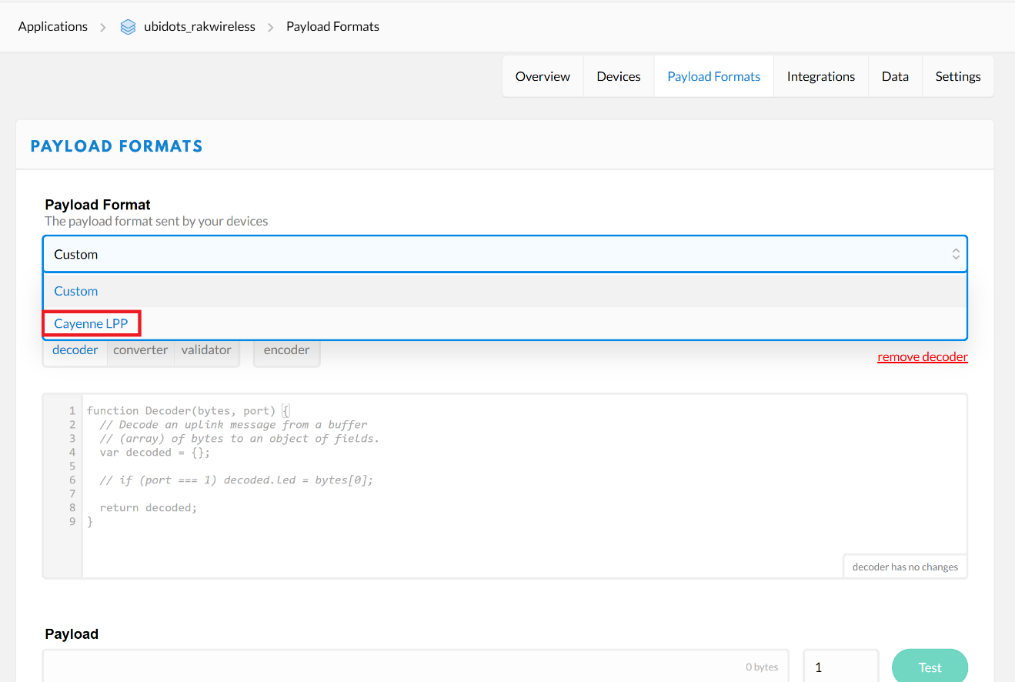
Figure 3 | Payload format – Cayenne LPP
After changing, create a Ubidots account on their website and fill-out the standard registration form. Add your integration to Ubidots next in TTN by going to the integrations section of the applications section (see Figure 4).
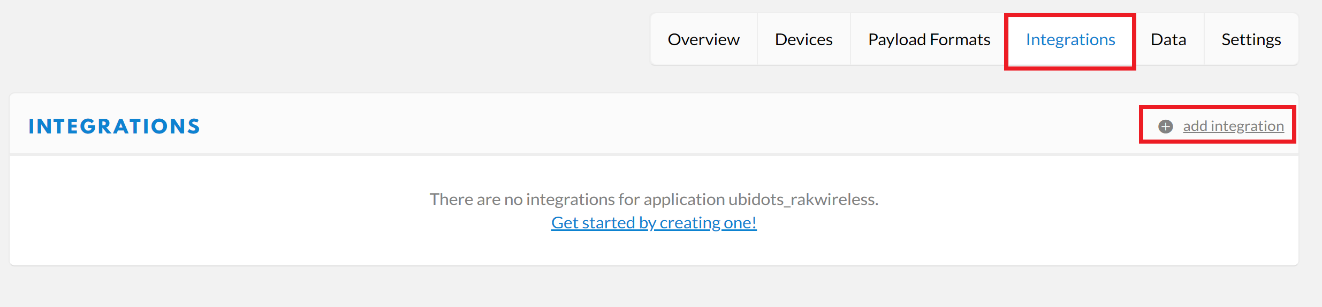
Figure 4 | Ubidots Integration
Choose Ubidots and enter a process ID, access key (i.e. default key), and a token in the integration configuration screen. The token is in your Ubidots user panel (see Figure 5).
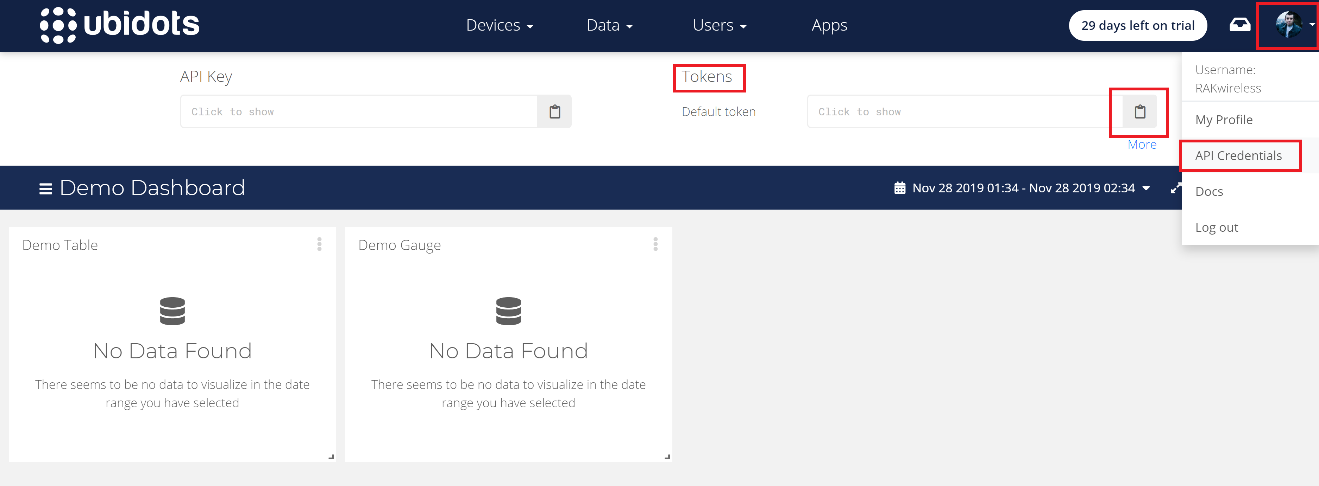
Figure 5 | Ubidots API Credentials - Token
Once the token is provided, you can now press the “Add integration” button in the lower right (see Figure 6).
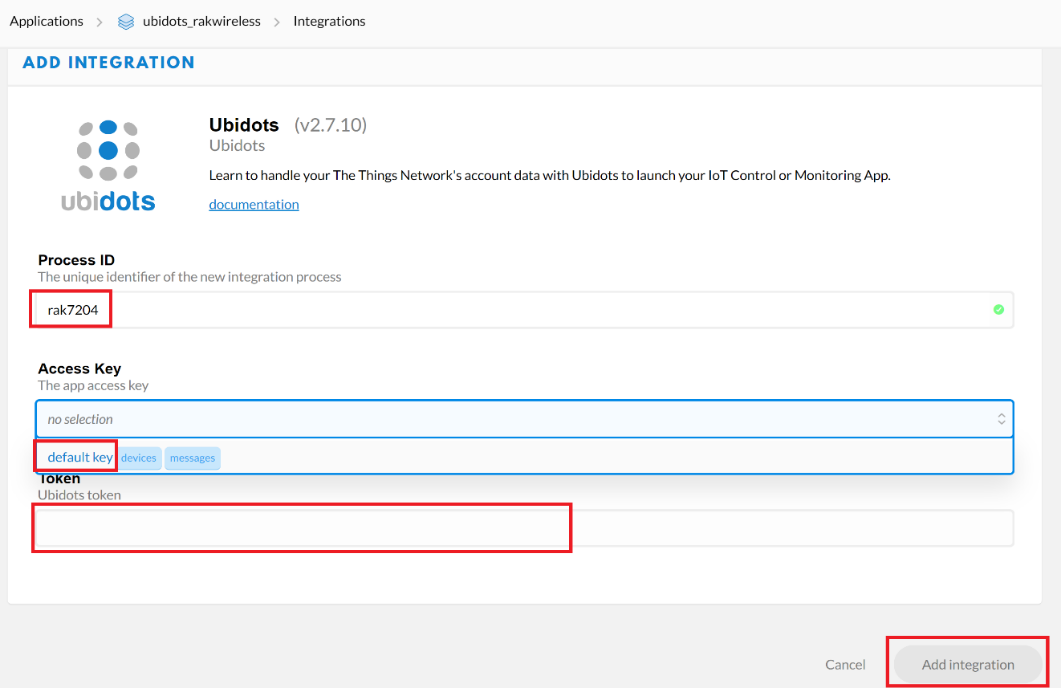
Figure 6 | Ubidots Integration configuration
Configure Ubidots dashboard and widgets
Once the TTN integration is set, you can see that the Ubidots device is automatically created in the “Devices” tab in Ubidots. By default, the device will be named with the Device EUI, but you can always change its name. Go to your own dashboard and populate it with widgets (see Figure 7).
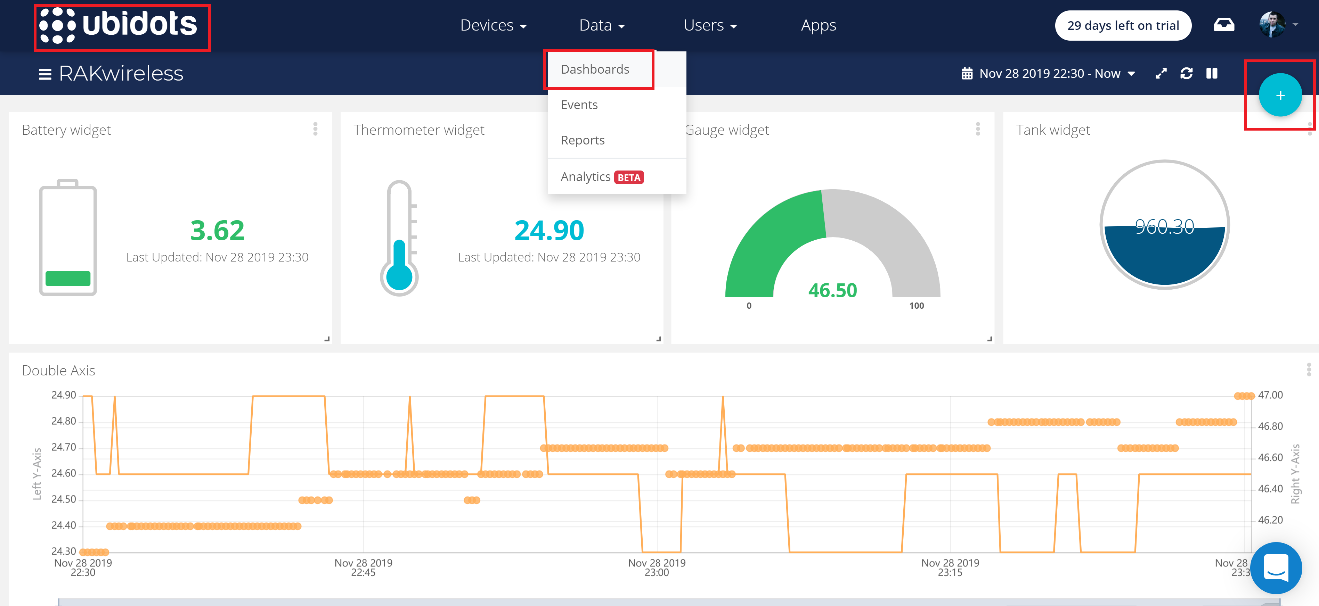
Figure 7 | Ubidots Dashboard – RAK7204 Widgets
You will see this exciting range of widgets that can be helpful for your deployment (Figure 8).
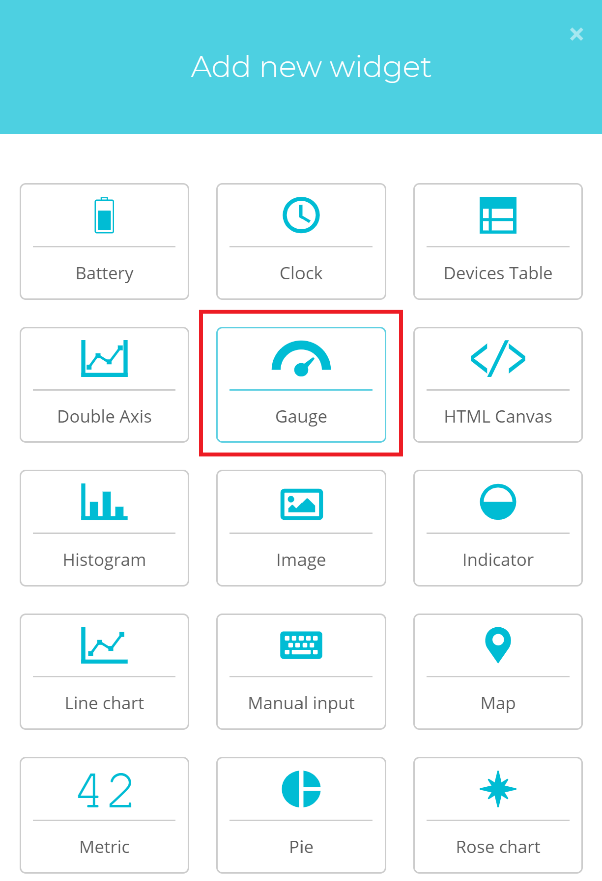
Figure 8 | Widgets selection screen
After selecting widgets, you will see a window that lets you choose one of the five variables available (see Figure 9).
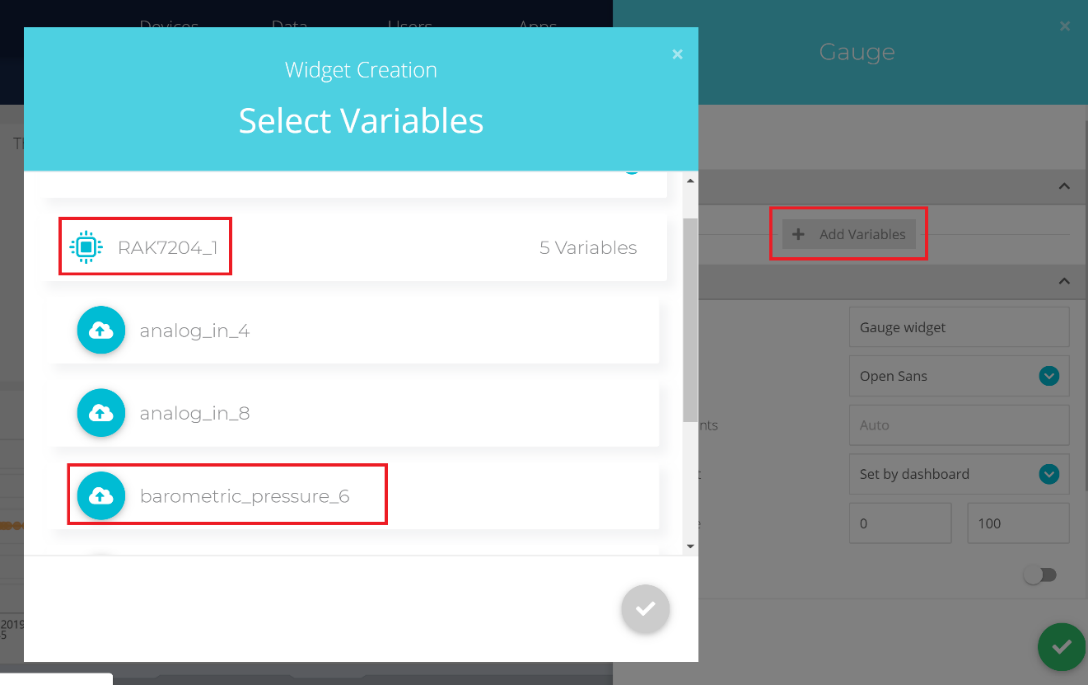
Figure 9 | Adding a Variable to display
Clicking this will create and display the widget. You can play with your visualization and show real-time data on the battery levels of your device. The temperature, humidity, and atmospheric pressure levels of the environment are also graphically presented.
Connecting things in IoT requires the analysis of data that devices gather from the environment. Raw data becomes meaningless when nobody understands it. With the use of IoT platforms like Ubidots, users can now easily visualize and comprehend data. The dashboard of Ubidots makes information palatable to users hence, allowing them to generate informed decisions in business, research, and machinery. Innovators and industries become empowered to prototype and plan IoT projects with the graphs and charts provided by Ubidots. Certainly, efforts of making IoT easy like that of Ubidots can accelerate the arrival of a smart future.

