

How to Build a Cleaner, More Repeatable Meshtastic Raspberry Pi Setup

The Raspberry Pi has become one of the most popular platforms for running Meshtastic, and it is easy to see why. It brings the flexibility of Linux into the mix, allowing you to run meshtasticd Raspberry Pi deployments alongside MQTT brokers, dashboards, logging tools, and automation workflows. On paper, it feels like the perfect foundation for building something more powerful than a typical handheld node within a LoRa communication system.
But if you have ever tried running a Raspberry Pi Meshtastic setup for more than a few days, especially in an always-on role, you have probably noticed something doesn’t quite hold up. The issue is rarely the software. More often, it is the hardware stack holding everything together. A Raspberry Pi Meshtastic node is only as reliable as the way its radio, sensors, and interfaces are connected.
The Common Problems With DIY Meshtastic Raspberry Pi Builds
A lot of Raspberry Pi Meshtastic setups work fine at first. The weak points usually show up later, once the node is expected to stay online and do more than basic testing.
- USB radios can drop unexpectedly
What starts as a simple connection can become unreliable over time, especially after long runtimes or small power dips. This is a common reason users search for how to fix Raspberry Pi USB disconnect issue. - Loose cables create avoidable failure points
USB connectors, jumper wires, and adapters can shift, wear out, or disconnect, turning a working node into something that needs constant checking. - Extra features add extra complexity
As soon as you add GPS, sensors, Node-RED, Grafana, or other tools used in wireless sensor networks, the wiring and dependency chain gets harder to manage. - Each build ends up slightly different
Small changes in parts, layout, or wiring make one setup harder to reproduce exactly on the next node. - Scaling becomes harder than expected
What works for one experiment does not always translate into a clean process for building multiple nodes the same way. - The setup was never really built for long-term use
Many DIY builds are good for testing ideas, but not for serving as a stable, always-on infrastructure or a stable Meshtastic node setup.
Why meshtasticd Changes the Role of Raspberry Pi Nodes
There is an important shift that happens when you move from firmware-based nodes to running meshtasticd on a Raspberry Pi. At that point, you are no longer just running a simple node. You are building something closer to an IoT gateway architecture.
Firmware-based devices are typically portable. They are designed for mobility, low power consumption, and simplicity. They do their job well, but they are not meant to host complex services or act as permanent network anchors.
A Raspberry Pi running meshtasticd plays a very different role. It becomes a Raspberry Pi LoRa gateway, a relay, or even a backbone node. It can bridge data into MQTT, feed dashboards, log activity, and support automation workflows. It is no longer just participating in the mesh; it is helping define a scalable mesh networking hardware environment.
That shift comes with new expectations. Infrastructure nodes are expected to stay online, maintain consistent connectivity, and operate without constant intervention. For that to happen, the hardware integration between the Pi and the radio must be just as stable as the software running on top of it.
What a Cleaner Meshtastic Raspberry Pi Setup Should Provide
A cleaner Raspberry Pi Meshtastic setup should do more than look organized. It should reduce the hardware weak points that cause downtime and make the build easier to repeat across multiple nodes.
A reliable setup should provide:
- Direct radio integration to avoid USB adapters and loose jumper wires.
- Stable power and data connections for long runtimes in gateway or relay roles.
- Modular expansion for adding GPS, sensors, or different LoRa radios without rebuilding the whole setup.
- Linux workflow compatibility so meshtasticd can run alongside MQTT, dashboards, logs, and automation tools.
- Repeatable deployment so one successful build can become the model for future nodes.
This is what separates a quick prototype from a Raspberry Pi Meshtastic gateway that is ready for real deployment or even a modular Raspberry Pi IoT gateway.
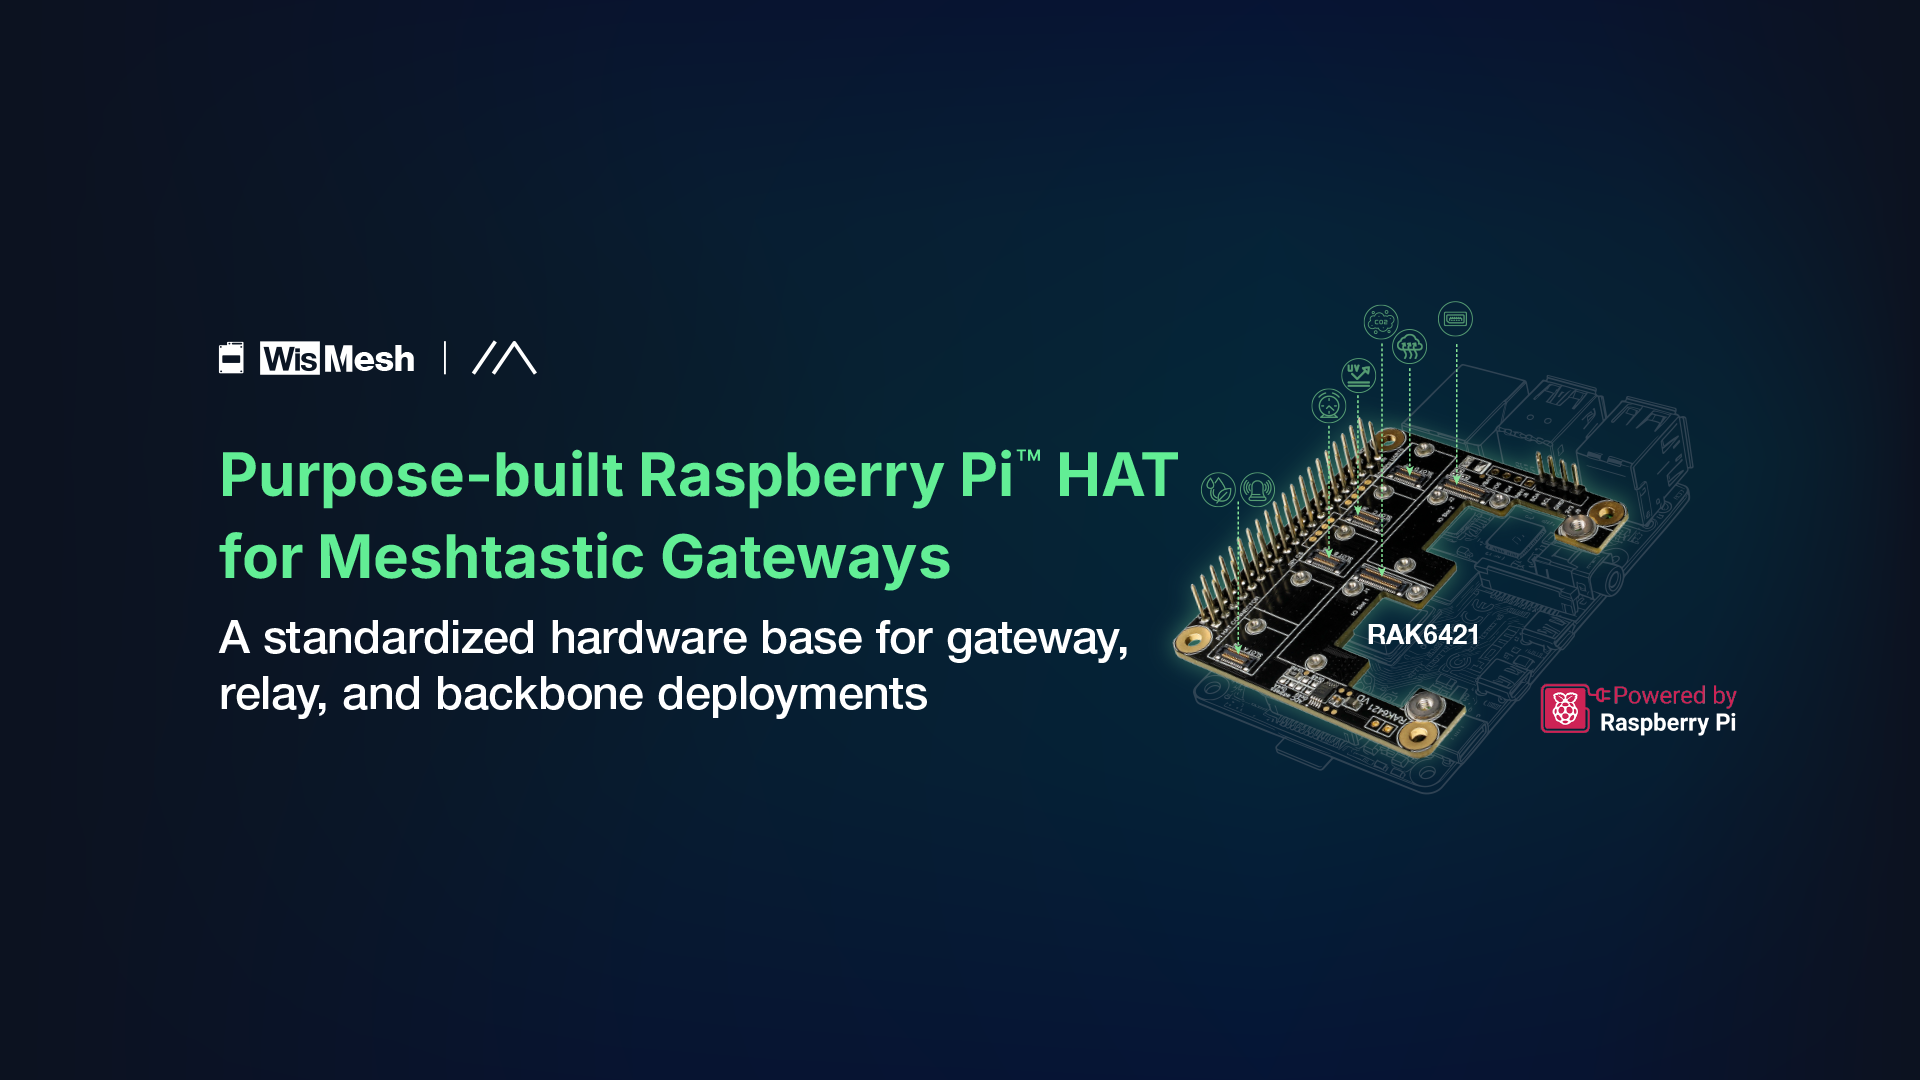
Introducing WisMesh Pi HAT RAK6421
WisMesh Pi HAT RAK6421 gives Raspberry Pi Meshtastic builds a cleaner way to connect WisBlock LoRa radios, GPS, and sensors without USB adapters or loose wiring. It serves as a purpose-built Raspberry Pi LoRa HAT designed for structured deployments.
It creates a more stable, repeatable base for gateways, relays, and backbone nodes running meshtasticd.

Key Features That Matter for Real Deployments
When you move from a DIY setup to something you expect to run continuously, the small details start to matter a lot more. It is no longer just about getting a node online, but about keeping it stable, easy to manage, and consistent across deployments.
This is where the WisMesh Pi HAT RAK6421 shifts the experience from a collection of parts into a more structured system, with each feature solving a very specific problem that builders often run into.
These features make it a strong candidate for the best LoRa HAT for Raspberry Pi, especially when reliability and scalability matter.
Example Use Cases
Once your Raspberry Pi setup becomes stable and repeatable, it stops being just a project and starts becoming something you can actually deploy with confidence. Instead of constantly checking connections or troubleshooting random issues, you can begin thinking in terms of roles within a network.
The different ways this kind of setup can be used become much clearer when you break them down:
Each of these scenarios reflects a shift in mindset. Instead of building a single node to experiment with, you are building parts of a larger system. And in that system, consistency and uptime are not optional. They are what make the network usable in the real world.
These deployments are typical in wireless sensor networks and low-power wide-area network environments.
How the WisMesh Pi HAT RAK6421 Compares to Generic LoRa HATs and DIY Setups
There are many ways to get a LoRa radio working with a Raspberry Pi, and most of them will get you to the same starting point. A USB radio or a generic LoRa HAT can be enough to bring a node online, send messages, and experiment with the network. For testing ideas or learning how Meshtastic works, that flexibility is often exactly what you need.
The difference becomes more noticeable over time, especially when the node is expected to run continuously or be deployed as part of a larger network. At that stage, the question shifts from “Does it work?” to “Will it keep working, and can I build more of them the same way?”
The comparison below shows how each setup path changes as the priority shifts from simply getting a node online to keeping it reliable and repeatable over time.
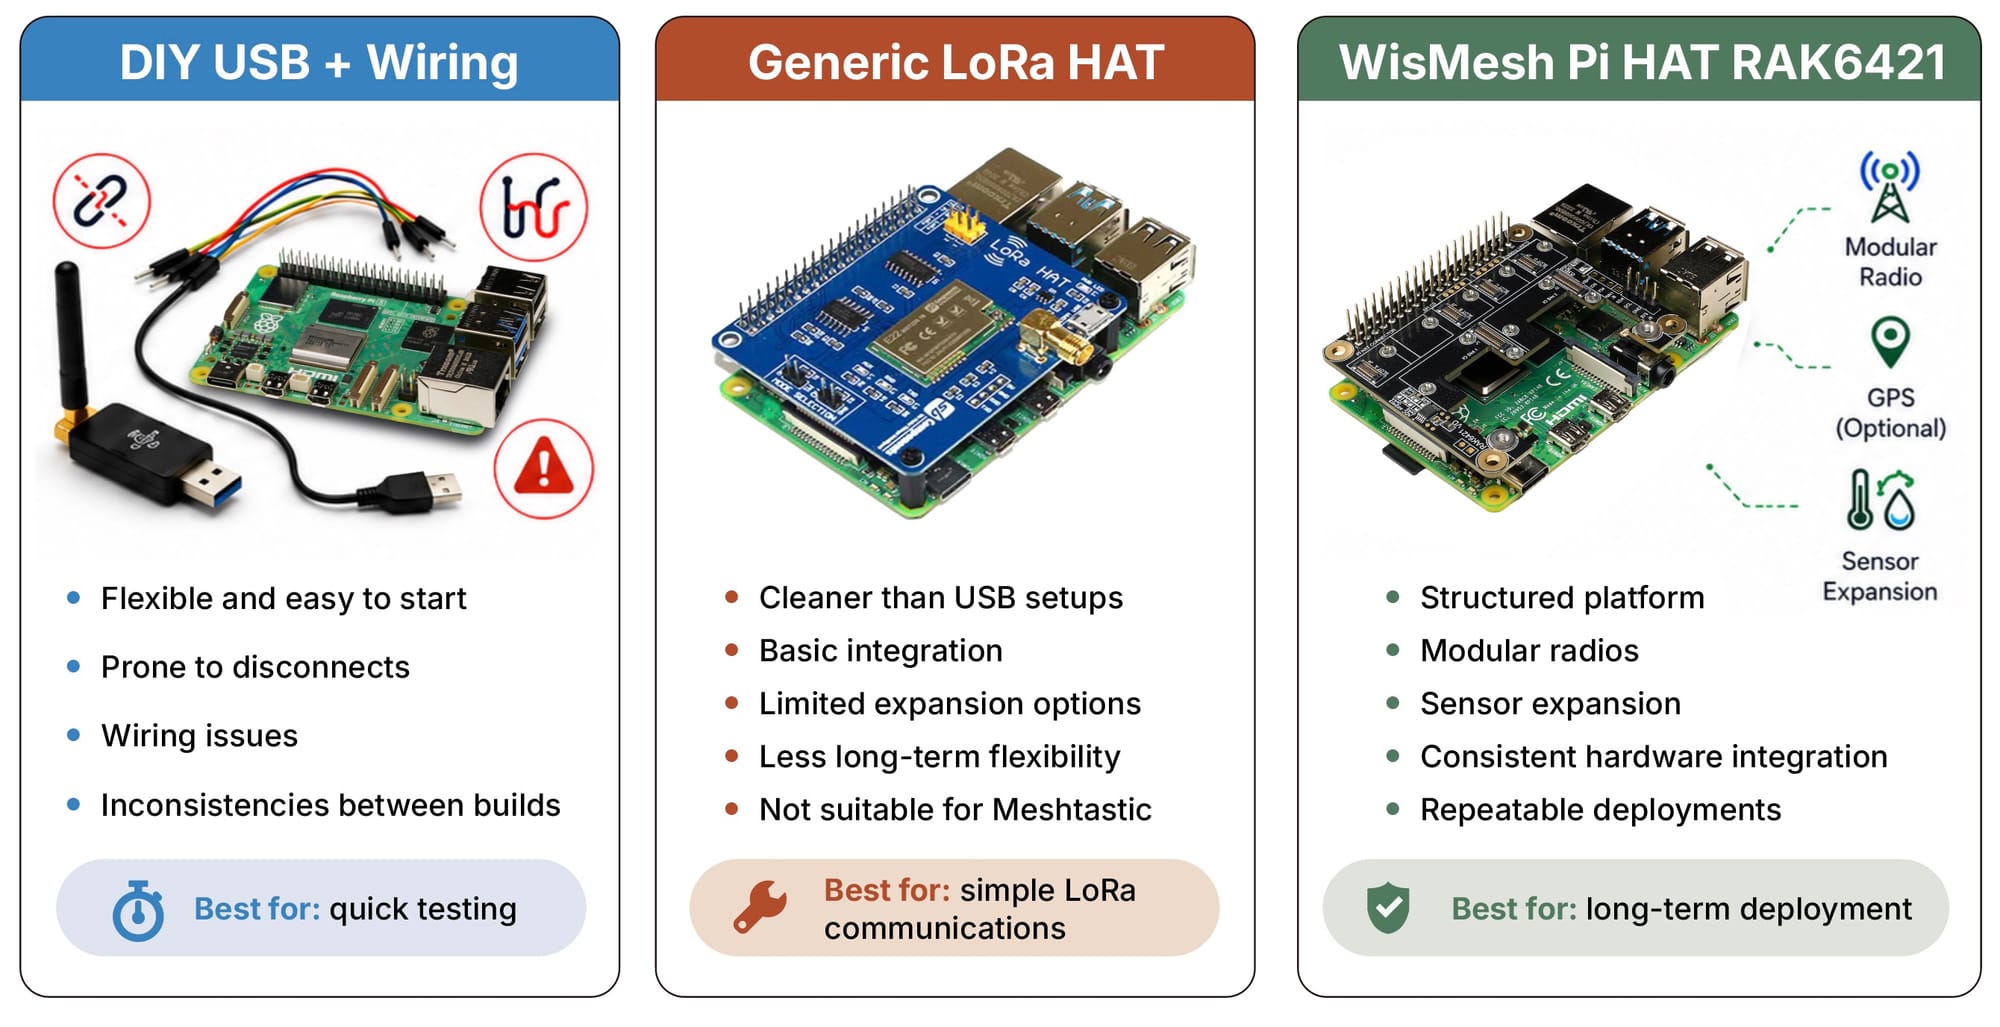
WisMesh Pi HAT RAK6421 stands out by combining a Pi-hosted Linux stack with WisBlock modularity, radio and sensor expansion, HAT+ auto-discovery, and support for high-power radio options. The result is not just a working node, but a platform that can be deployed consistently across multiple locations.
What You Need to Build a Working Node
It is important to understand that the HAT itself is only one part of the system. A complete setup typically includes a Raspberry Pi, such as a Pi 4 or Pi 5, along with a compatible LoRa radio module and an antenna. Depending on your use case, you might also add GPS or sensor modules to expand functionality.
On the software side, meshtasticd provides the core service, either through manual setup or a preconfigured system image. Once everything is in place, the hardware and software come together to form a node that is ready for long-term operation.
A complete Meshtastic setup is a combination of hardware and software layers working together as seen below:
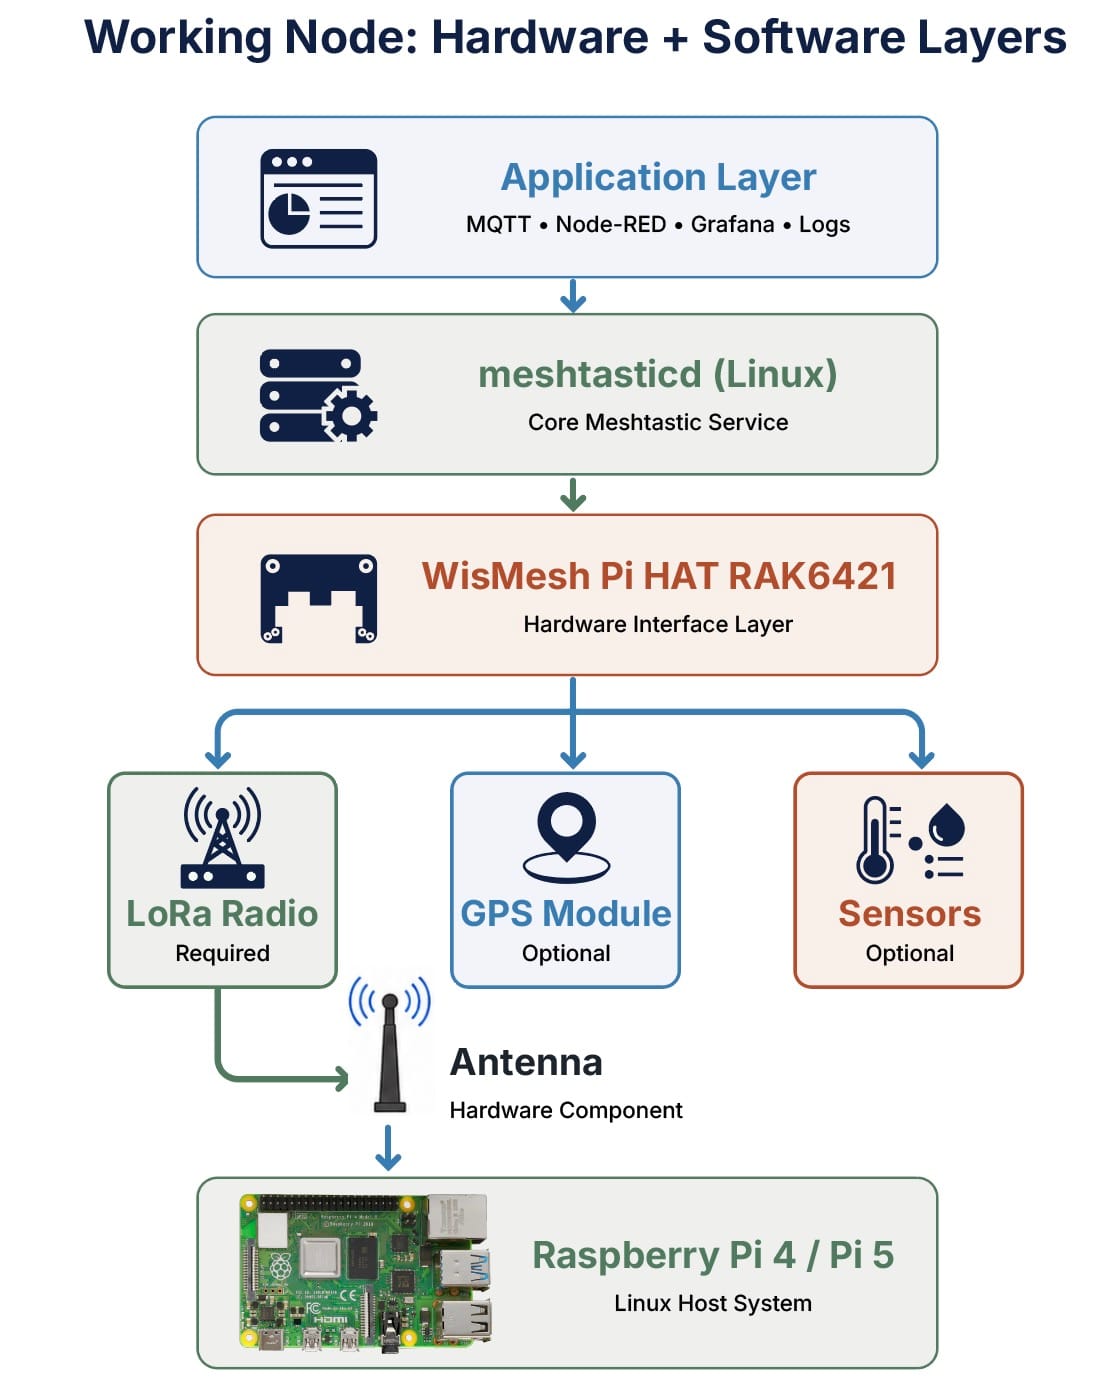
So how does it work?
The Raspberry Pi acts as the main system, running Linux and hosting meshtasticd. The WisMesh Pi HAT RAK6421 sits directly on top of it, acting as the structured interface that connects radios and expansion modules without relying on USB or loose wiring.
From there, the LoRa radio handles communication, while optional GPS and sensor modules extend the node’s capabilities depending on your use case. The antenna ensures proper signal transmission, and on the software side, meshtasticd enables integration with tools like MQTT, Node-RED, or dashboards.
The HAT is not the node itself, but the foundation that makes the entire system cleaner, more stable, and easier to replicate.
Build a Cleaner Raspberry Pi Meshtastic Gateway
At some point, most Raspberry Pi Meshtastic setups reach a turning point. What starts as a simple and flexible DIY build begins to show its limits when it is expected to run continuously or support a larger network. Small issues like USB disconnects or loose wiring stop being minor inconveniences and start becoming real obstacles.
Moving to a cleaner, more structured approach changes that experience entirely. Instead of managing a fragile setup, you begin working with a system that is easier to trust, easier to replicate, and better suited for always-on roles like gateways, relays, and backbone nodes.
WisMesh Pi HAT RAK6421 is designed to support that transition by providing a modular and reliable hardware foundation for Raspberry Pi-based Meshtastic deployments. It helps turn a collection of components into something that behaves more like infrastructure.
If you are ready to move beyond experimentation and build something more stable, you can start by learning how to design your setup the right way.